-
Shadow Colour for SketchUp®
-
Shadow Colour for Autodesk® Revit®
-
Planary for Autodesk® Revit®
-
Planary for Autodesk® AutoCAD®
-
Plan Match for Autodesk® Revit®
-
Account Management
Mixed-Use Building
Planary allows you to create floors with multiple uses. In this article, we will see how to create a mixed used building.
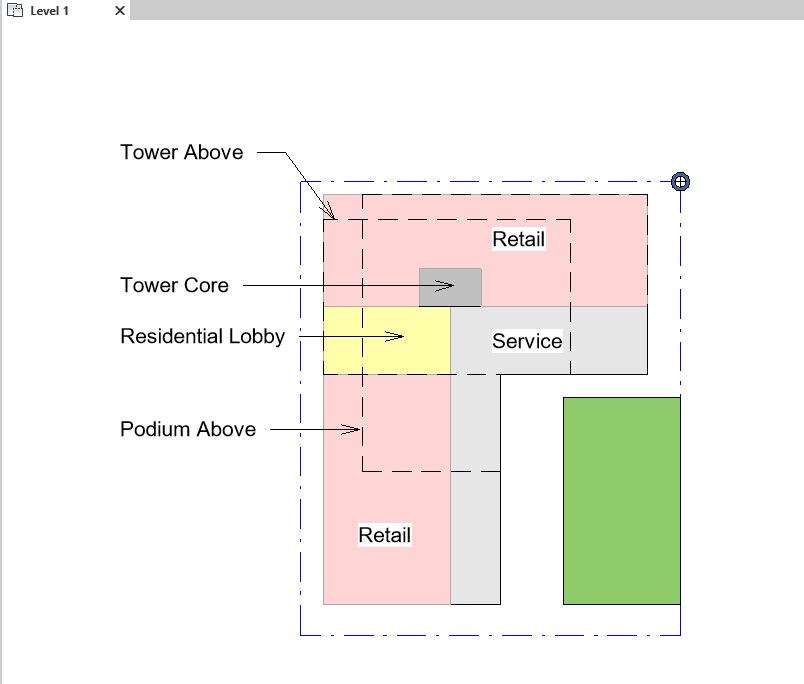
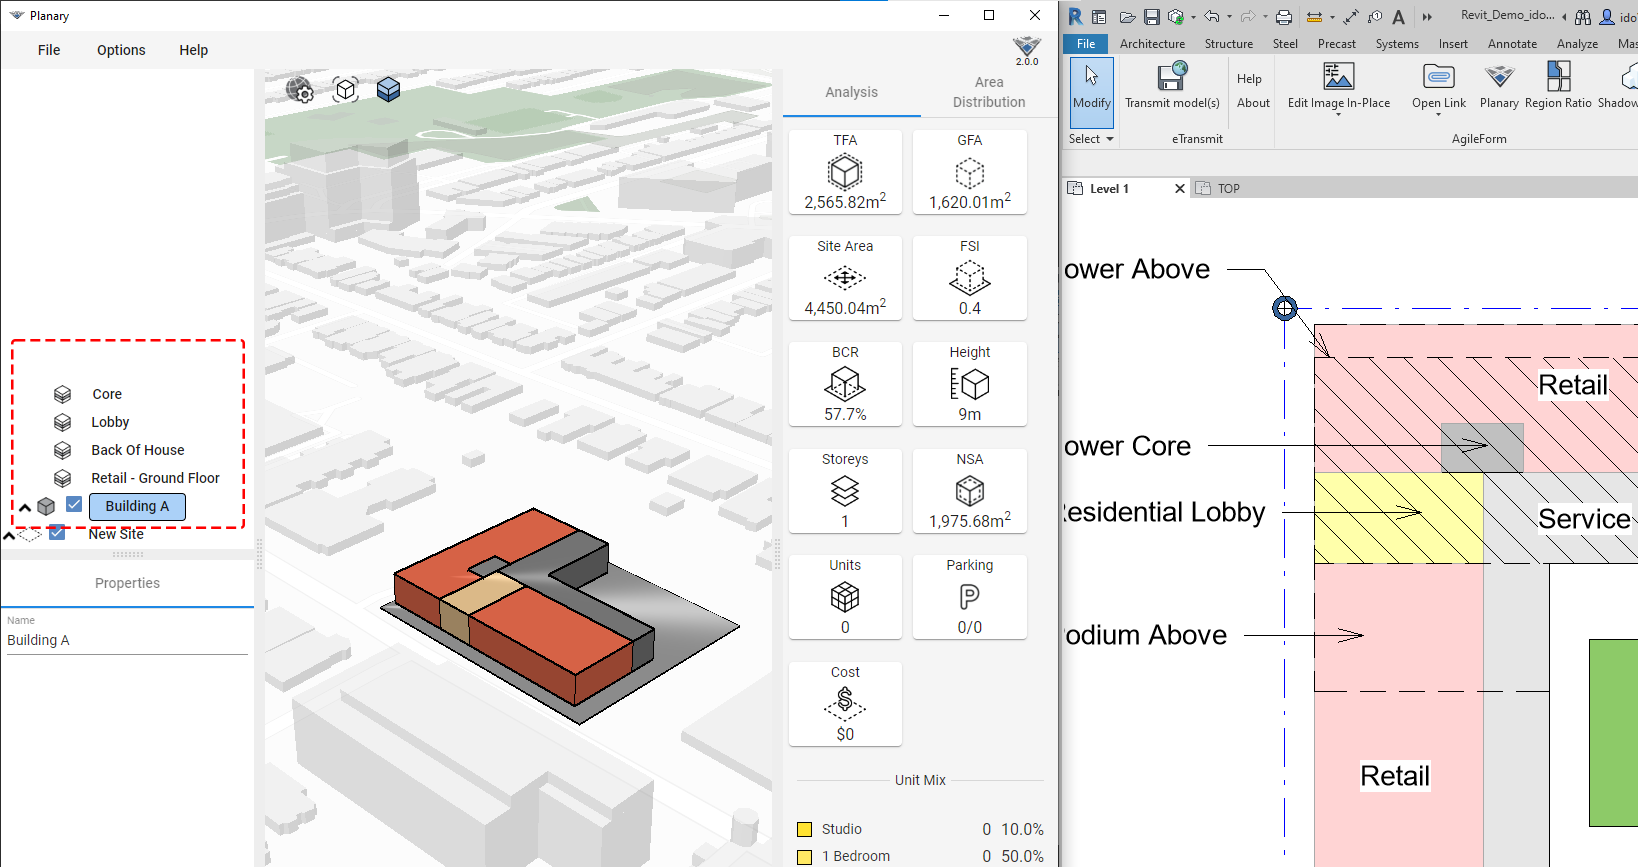
1. Sketch your mixed-use floor plan using filled regions.
In the following sketch, we have a residential building with a retail and service area on the ground level
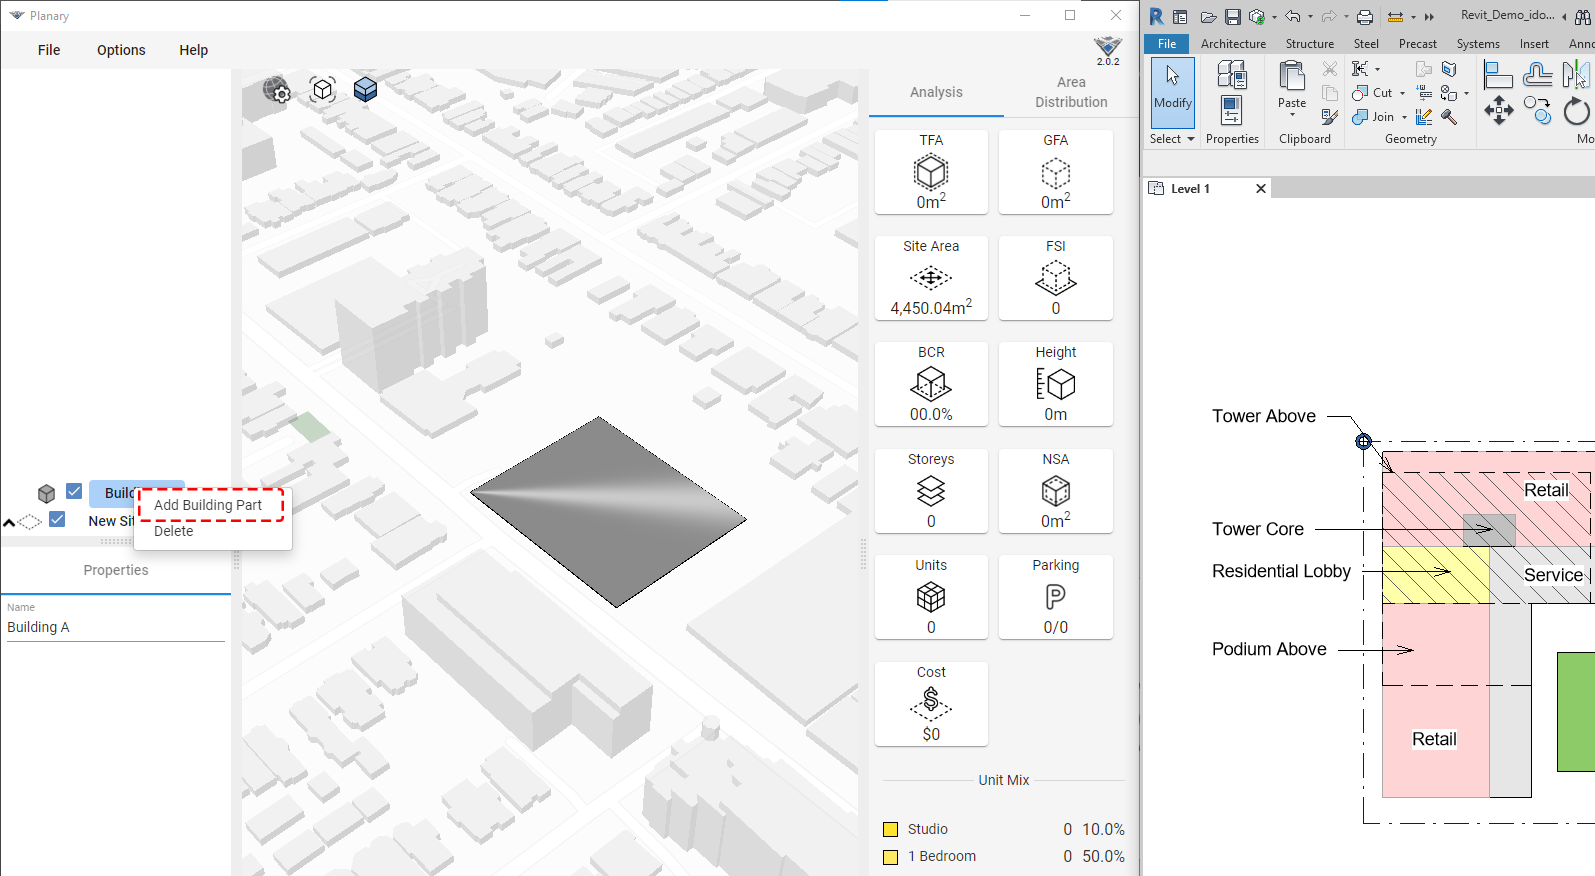
2. Go to the browser, right-click on your building, and select ‘Add Building Part’.
Go back to Revit and select a filled region from the view.
3. Assign usage in the properties window.
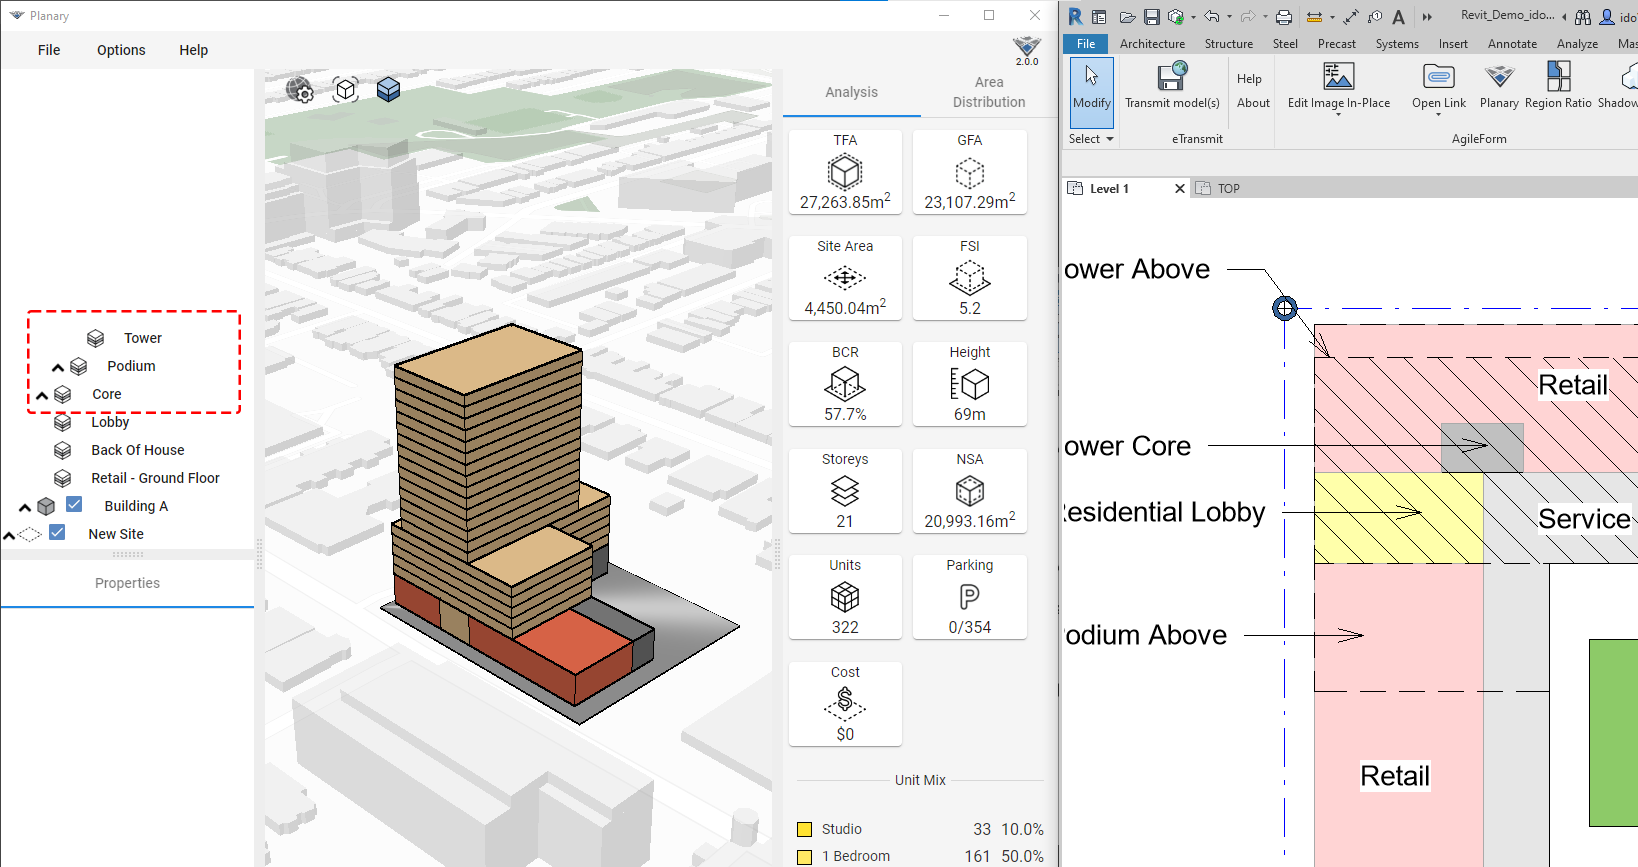
4. Right-click on the building Part, select ‘Add Building Part on Level’ from the drop down menu and pick a filled region from the Revit view for the second use.
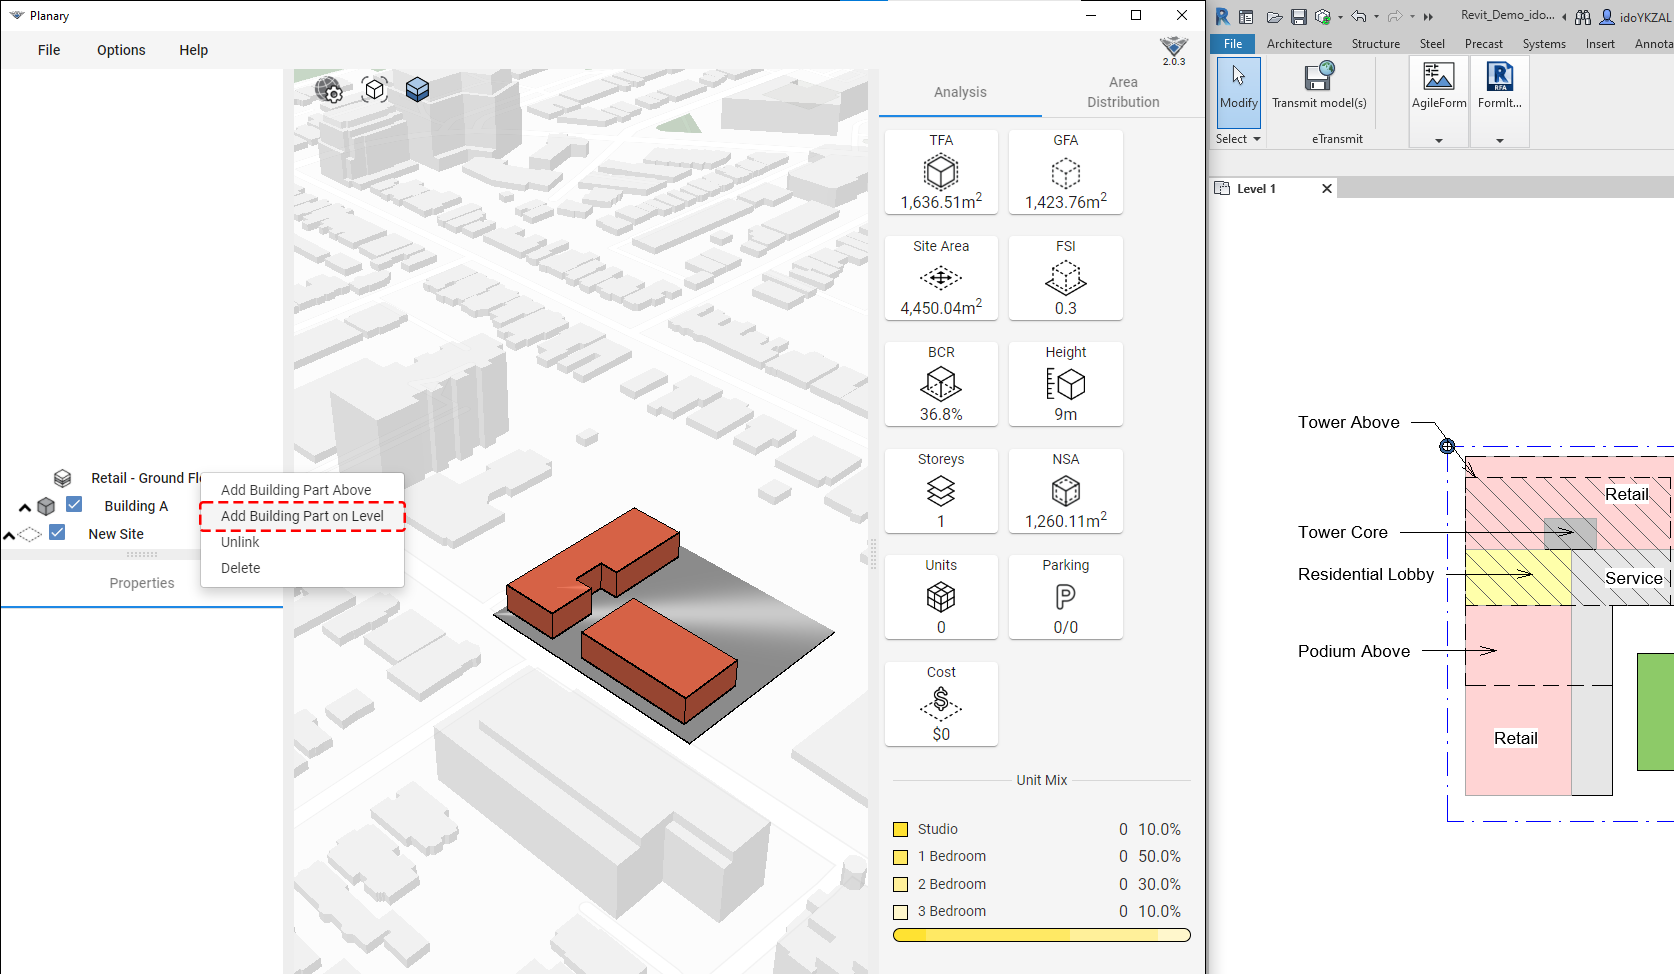
5. To add more uses on the same level, Right-click on building part select ‘Add Building Part on Level’ from the drop down menu and select filled region from the Revit view.
6. The next step will be to stack the other building parts on top of the floor we just created. You can do it by right-clicking any building parts, selecting ‘Add Building Part Above’ from the drop-down menu, and picking a polyline from Revit.
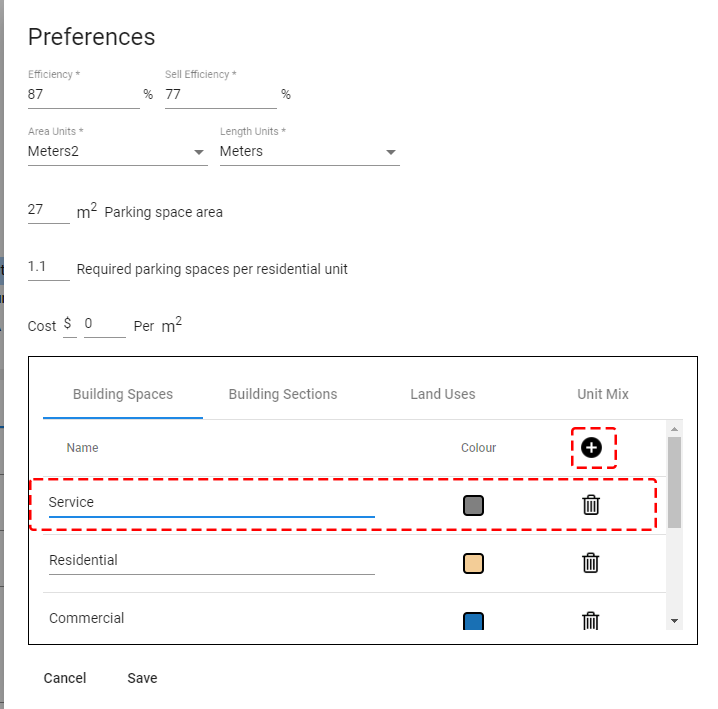
6. You can manage the project uses through Menu → ‘Options’ → ‘Preferences’.
In this example, we will add a new use named ‘Service’
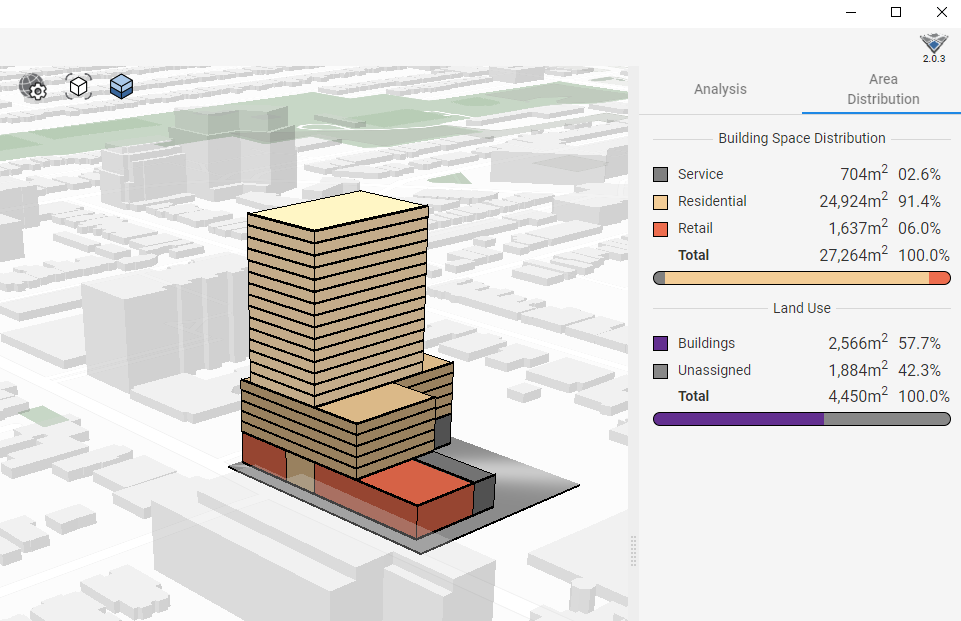
7. After assigning the ‘Service’ use to our building part, we can go to the ‘Area Distribution’ tab to review the use distribution of our project.
The analysis will be updated automatically as we work on our project.
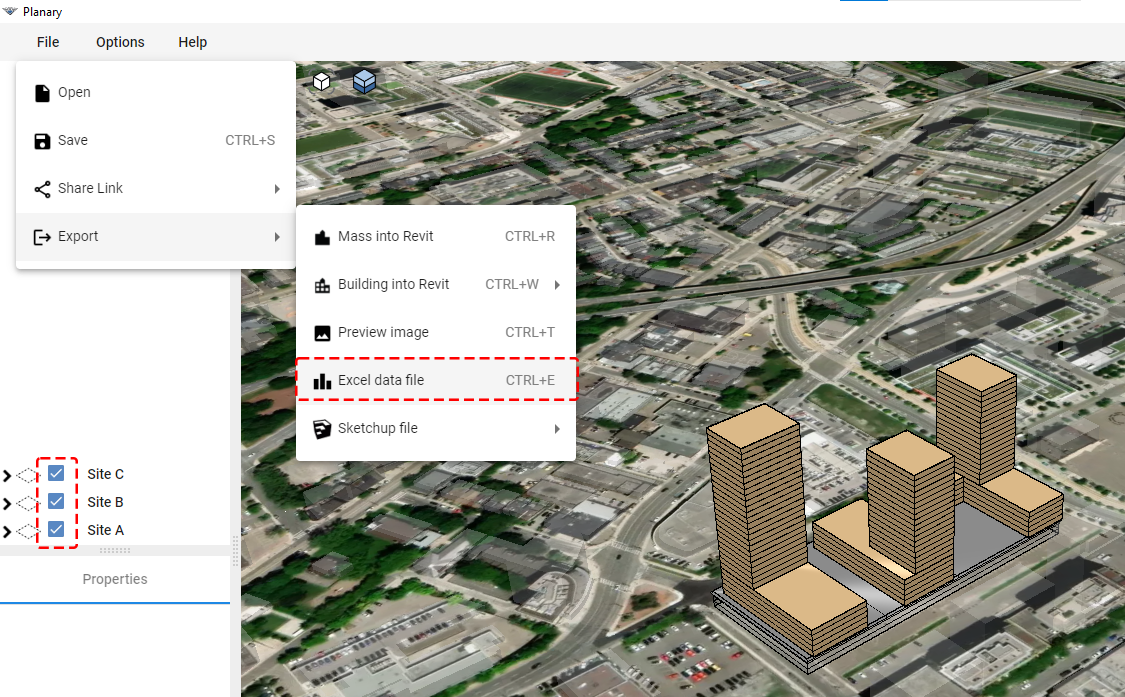
8. The final step will be to export our study statistics to excel file.
Go to File → Export and select ‘Excel data file’