-
Shadow Colour for SketchUp®
-
Shadow Colour for Autodesk® Revit®
-
Planary for Autodesk® Revit®
-
Planary for Autodesk® AutoCAD®
-
Plan Match for Autodesk® Revit®
-
Account Management
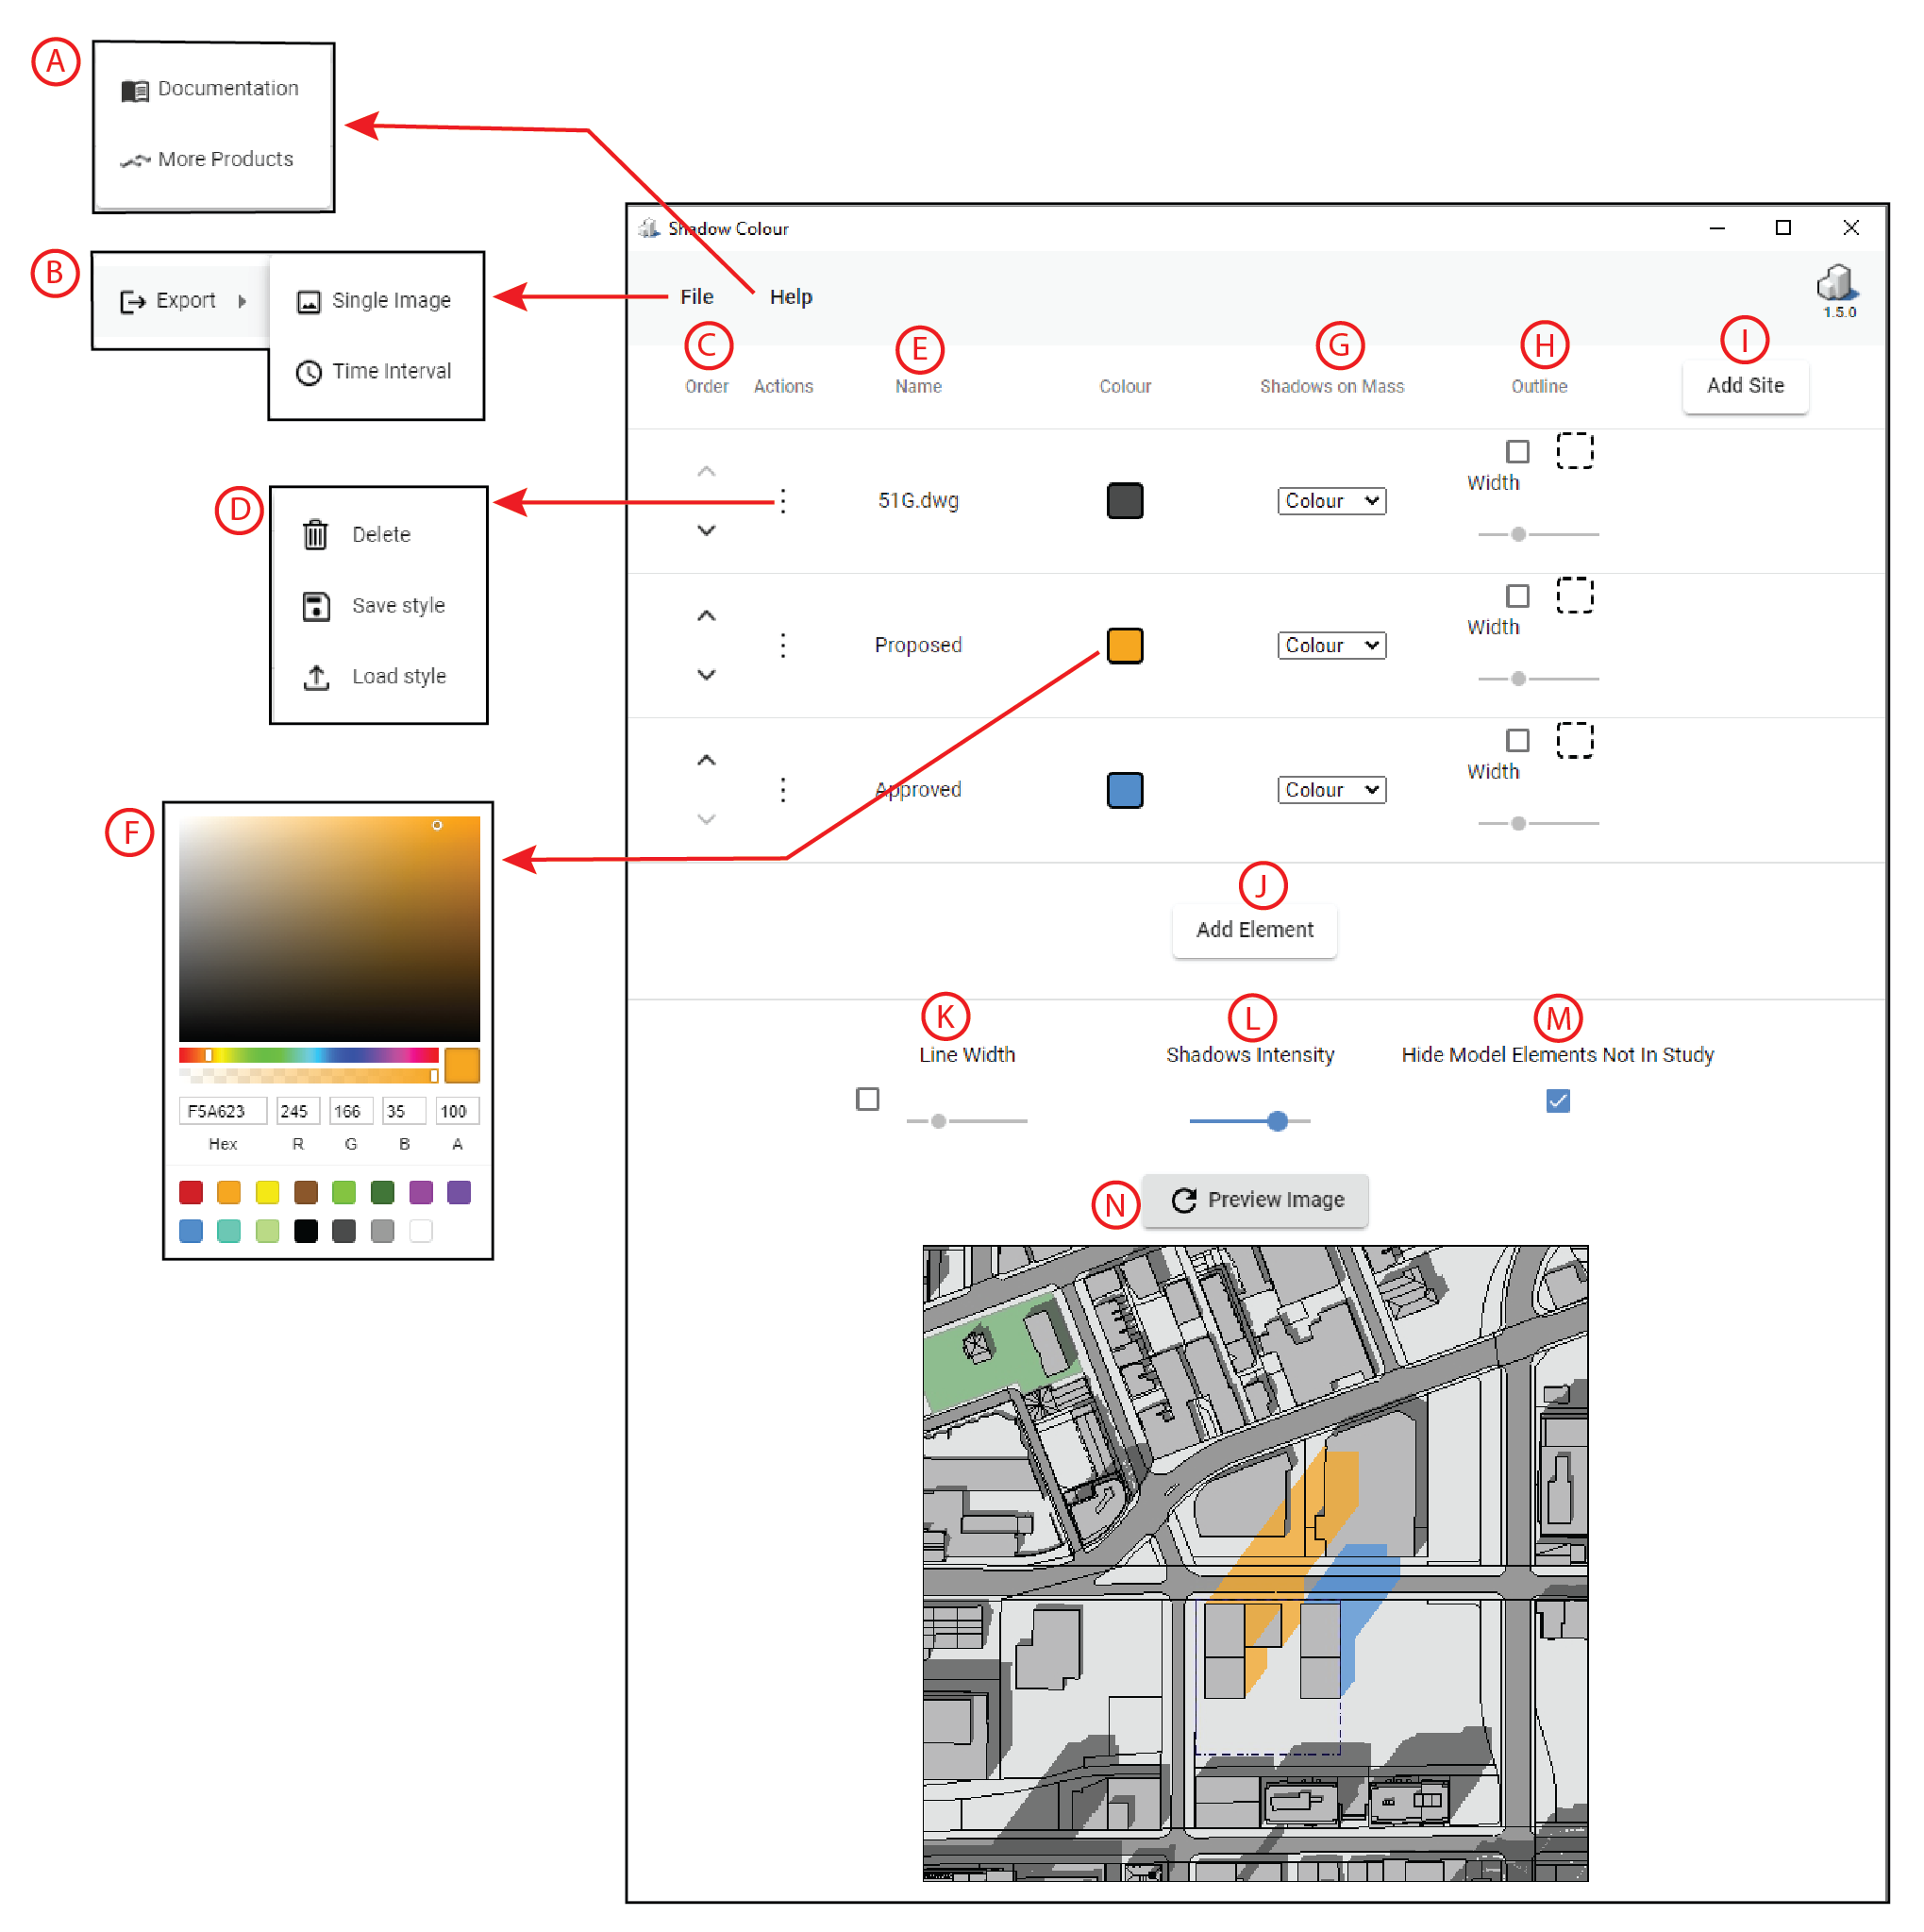
Shadow Colour Interface
In this article we will summarize and overview Shadow Colour interface.
A. Help menu, contains links to helpful articles and videos on how to use shadow colour.
B. Export a high-quality image.
C. Change elements(layers) order using the arrows.
D. Save, load, or delete an Element(layer).
E. The name of selected element(layer).
F. Colour picker – The colour picker pops up whenever you press the coloured square. You can choose a colour as well as opacity.
G. Colour source of the shadows cast on the corresponding element (layer).
- Colour – Any shadow that is cast on this element will be coloured using the colour that was chosen for the element that is casting the shadow.
- As Revit – Any shadow cast on this element will be coloured grey using the shadow intensity configured in Revit.
- Invisible – Shadows cast on this element will not be shown.
H. Use the slider to set the line width for the shadow’s outline (optional)
I. Add a site and assign a different colour for shadows within the site.
J. Add elements from the Revit view (massing, linked CAD/SKP, linked Revit, groups, and Revit components).
K. Override line width of your Revit view.Use the slider to set line width (optional)
L. Set the shadow intensity for the image.
M. Hide Model Elements not in Study – Shadow Colour will not include unpicked model elements in the study.
N. Generate/Refresh preview image – You may press ‘Preview Image’ to get a preview of how your shadow study will look like.