Knowledge Base
-
Shadow Colour for SketchUp®
-
Shadow Colour for Autodesk® Revit®
-
Planary for Autodesk® Revit®
-
Planary for Autodesk® AutoCAD®
-
Plan Match for Autodesk® Revit®
-
- Articles coming soon
-
-
Account Management
-
Changelog
Export Images and GIFs
There are multiple ways to export your shadow study.
For a quick export of a single image go to ‘File’ → ‘Export’ → ‘Single Image’ and select the export quality.

To export multiple images at once using time intervals, follow these steps:
- Go to ‘File’ → ‘Export’ → ‘Time Interval.’
- Select the date, time range, and interval.
- Choose the export mode:
- ‘File’: Export the images as individual files.
- ‘Sheet’: Place the images onto a sheet.
- Select the desired image quality.
- Optionally, add a superposition image. This overlays all images into a single shadow study image.
- Optionally check Anti-Alias.
- Optionally, export a GIF file with an animation of the shadow study images. You can set the delay in milliseconds for each image. (Available only in ‘File’ export mode)
- Shadow Area Calculation: export an Excel data sheet containing the shadow area calculation. (Available only in ‘File’ export mode)
- For the ‘Sheet’ export mode, select the layout and preferred title block.
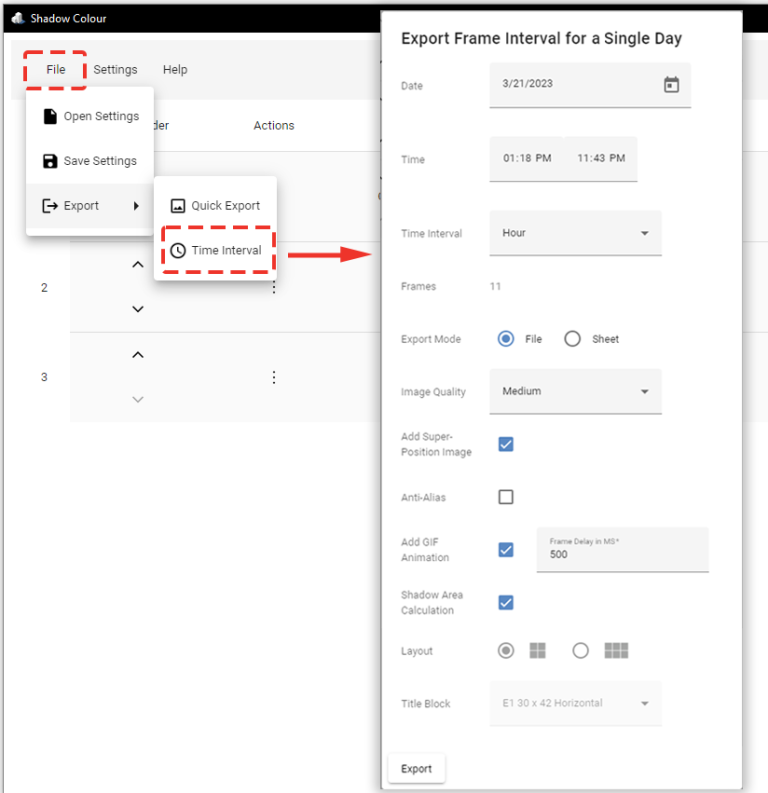
Table of Contents