-
Shadow Colour for SketchUp®
-
Shadow Colour for Autodesk® Revit®
-
Planary for Autodesk® Revit®
-
Planary for Autodesk® AutoCAD®
-
Plan Match for Autodesk® Revit®
-
- Articles coming soon
-
-
Account Management
Conduct a Shadow Study
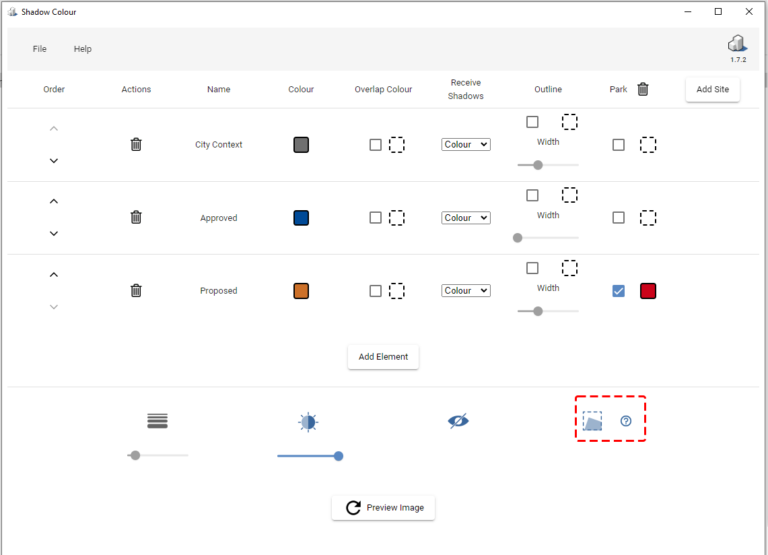
Add elements and assign colours
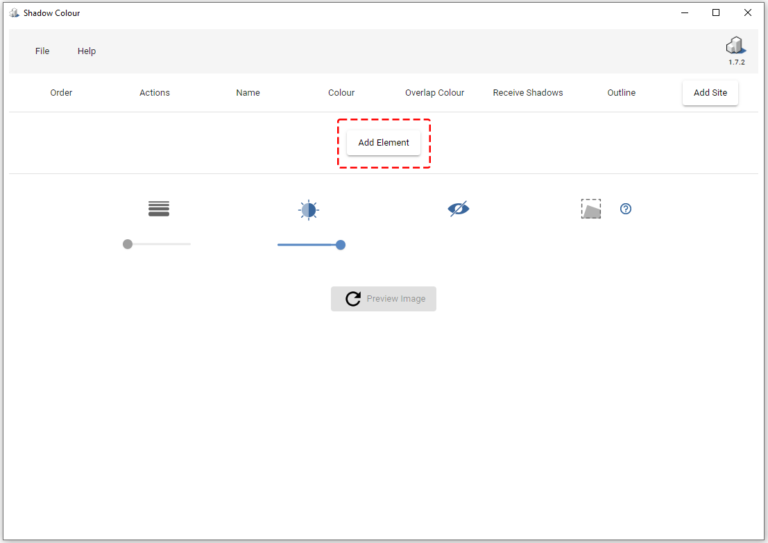
1. Click on ‘Add Element’ and pick a group or component in SketchUp. The first element will be the top layer (usually the city context), and the last will be the bottom layer (usually the proposed building).
2. Assign colour and opacity for each element (layer) by using the colour picker.

3. Under ‘Actions’, you can remove the element from Shadow Colour.
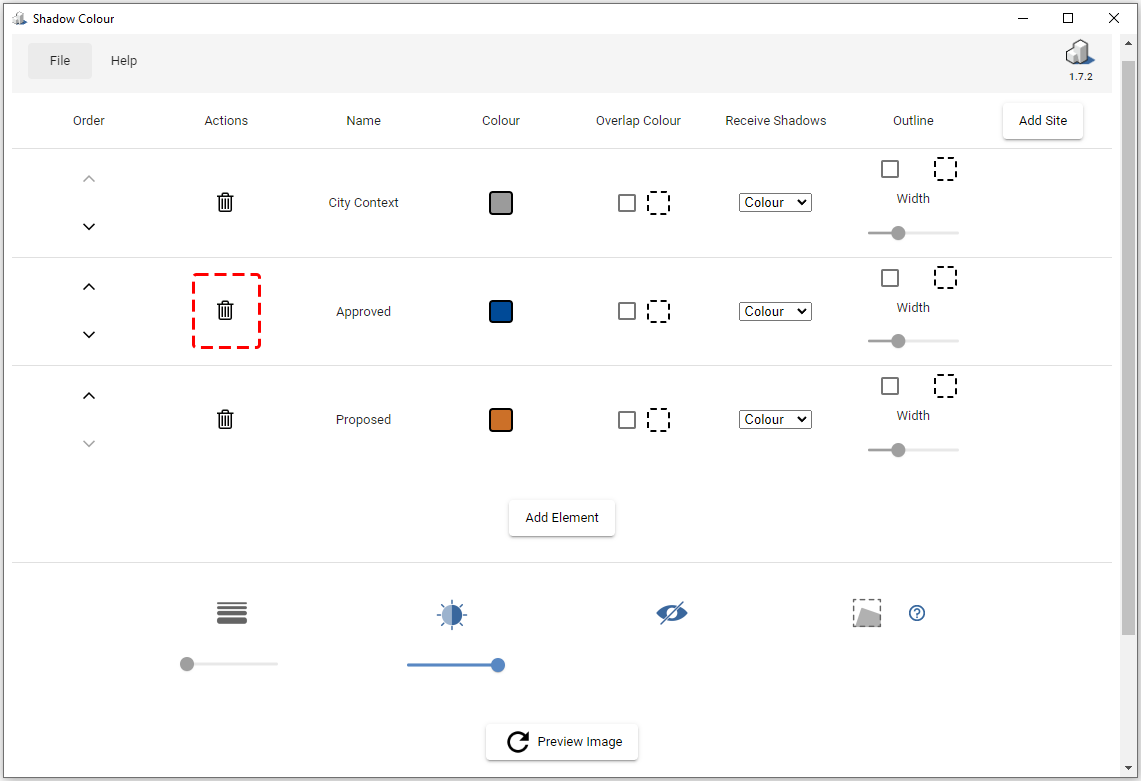
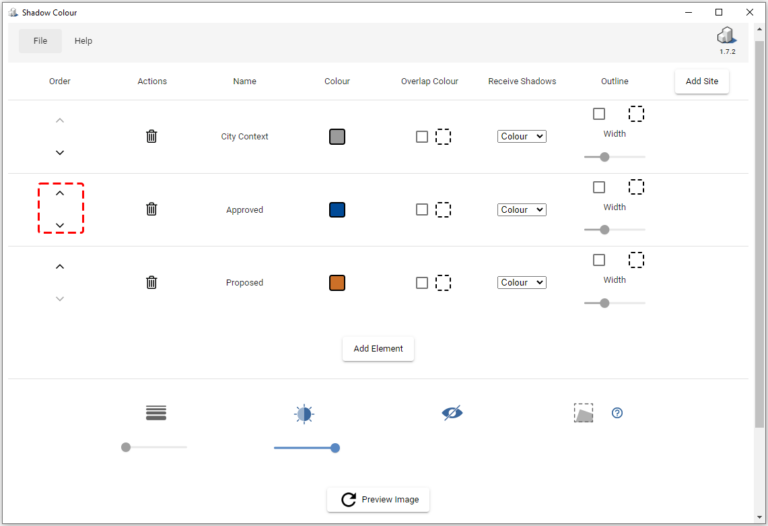
4. You may change the order of the shadows laid on top of each other.
Up – Bring element’s shadow forward
Down – Send element’s shadow backward
5. Under ‘Overlap Colour’, you can assign a colour for the overlapping shadow to the corresponding layer.
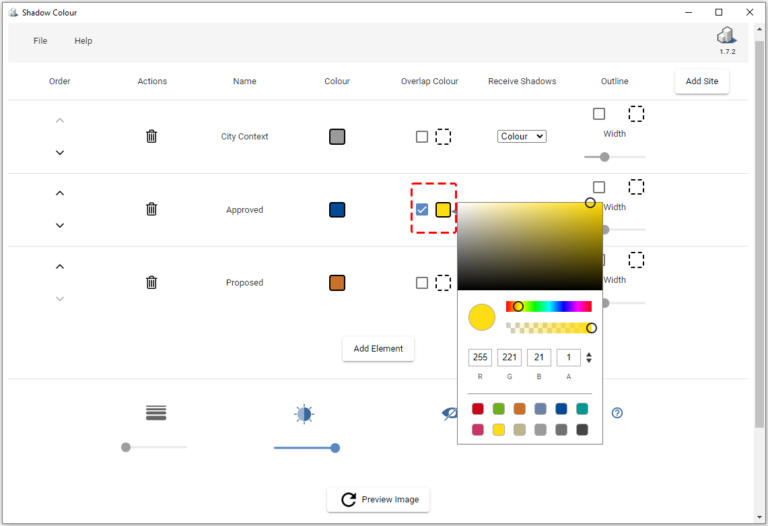
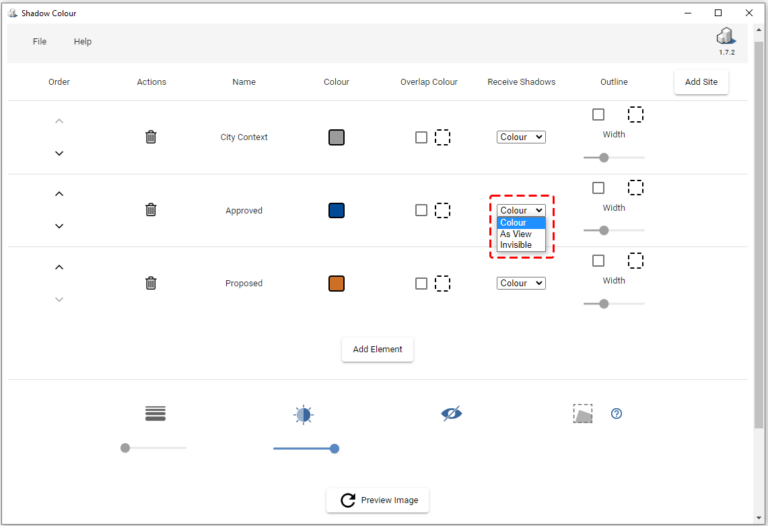
6. Change the colour of the shadows cast on top of the corresponding element (layer).
- Colour – Any shadow that is cast on this element will be coloured using the colour that was chosen for the element that is casting the shadow.
- As View- Any shadow cast on this element will be coloured grey using the shadow intensity configured in SketchUp.
- Invisible – Shadows cast on this element will not be shown.
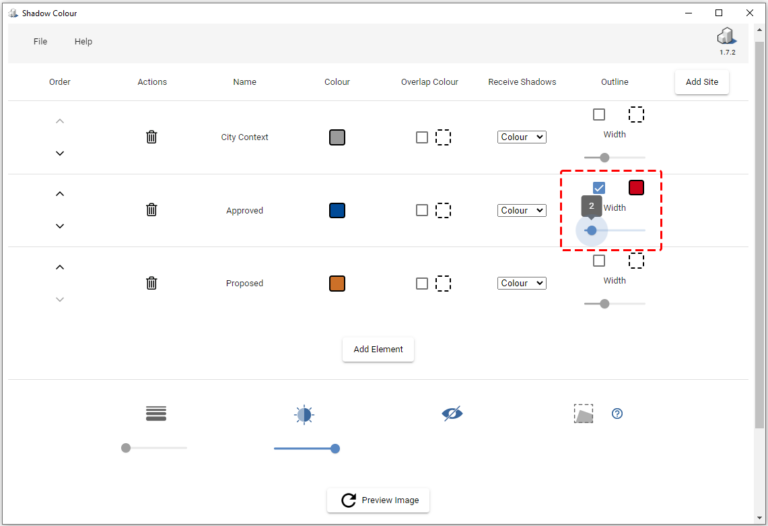
7. Create an outline for shadow (optional). Choose a colour and outline width using the slider.
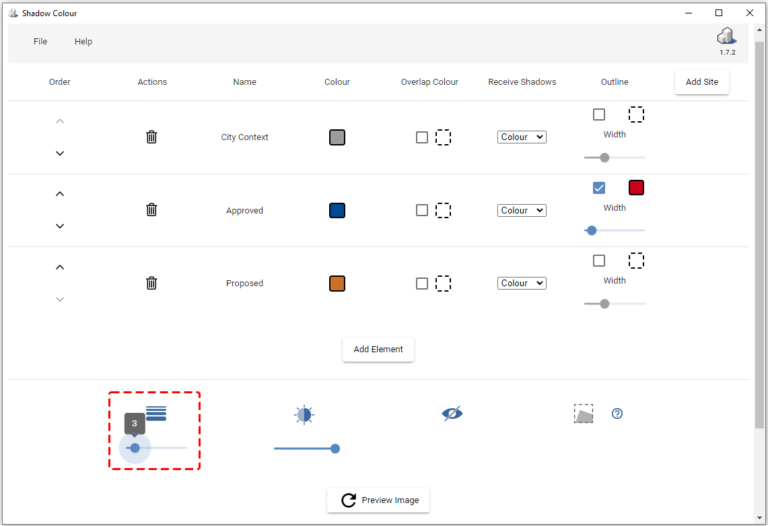
8. Optionally, you may change all the lines’ width in the view using the slider under ‘Line Width’
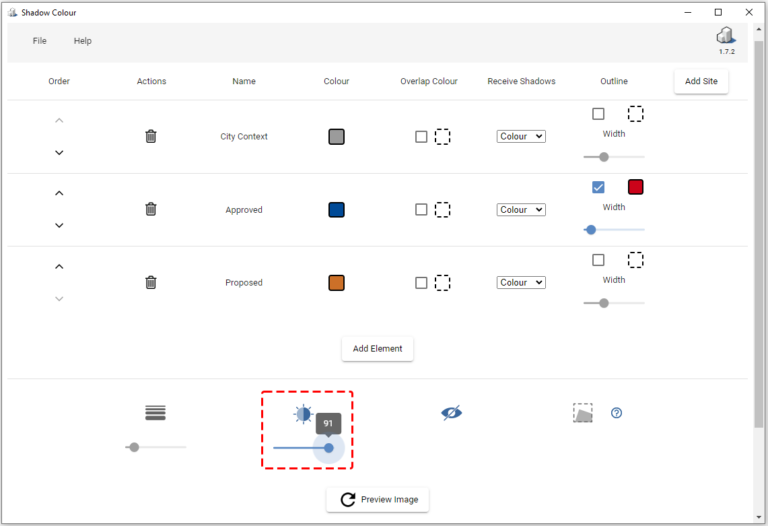
9. You can control the shadow intensity in the view using the ‘Shadow Intensity’ slider. Higher values mean more intense shadows while lower values mean more transparent shadows.
10. Hide model elements that are not in the study – Shadow Colour will not include unpicked model elements in the study.
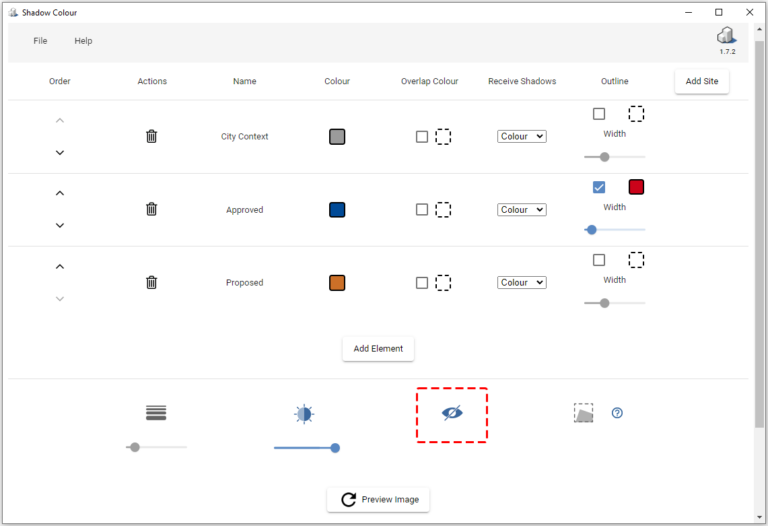
11. Press ‘Preview Image’ to get a preview of how your shadow study will look like.

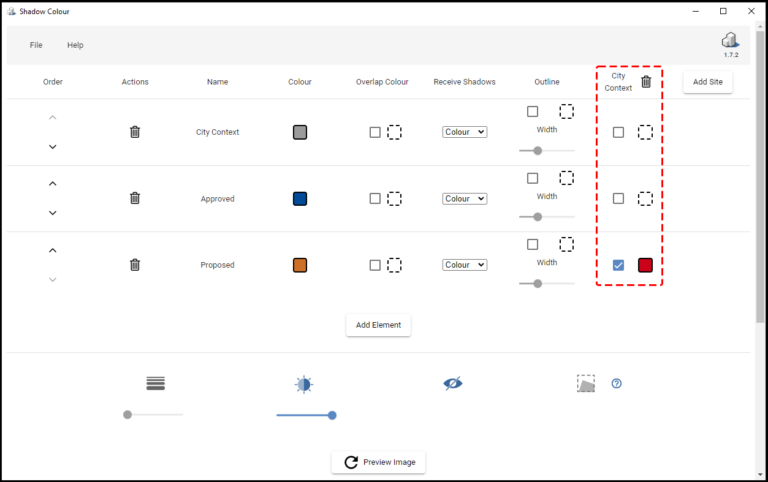
Shadows Colour on Sites
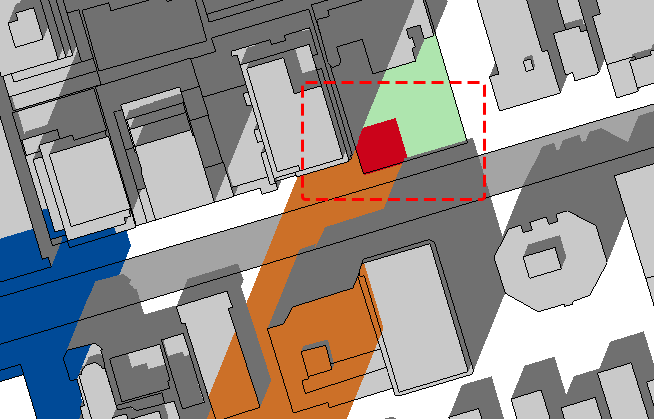
In certain scenarios, you might want to use a different colour for shadows that are cast within a specific site/property.
You may assign a different colour for shadows within a site.
1. Click ‘Add Site’ and pick a surface from the SketchUp view.
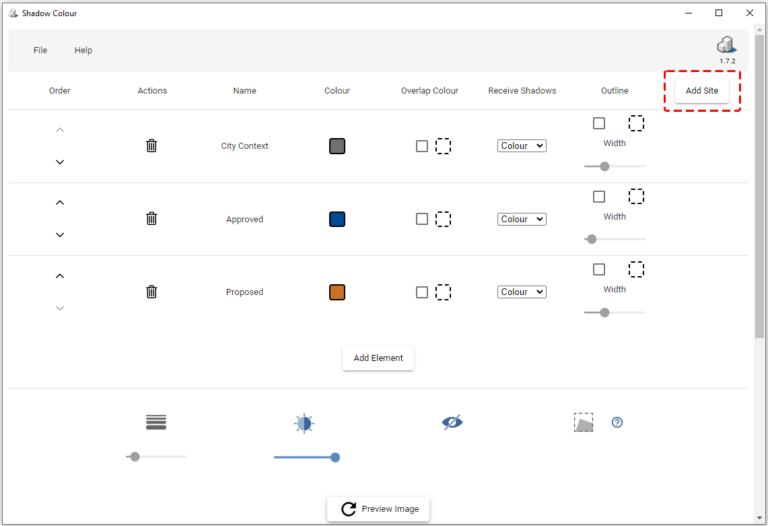
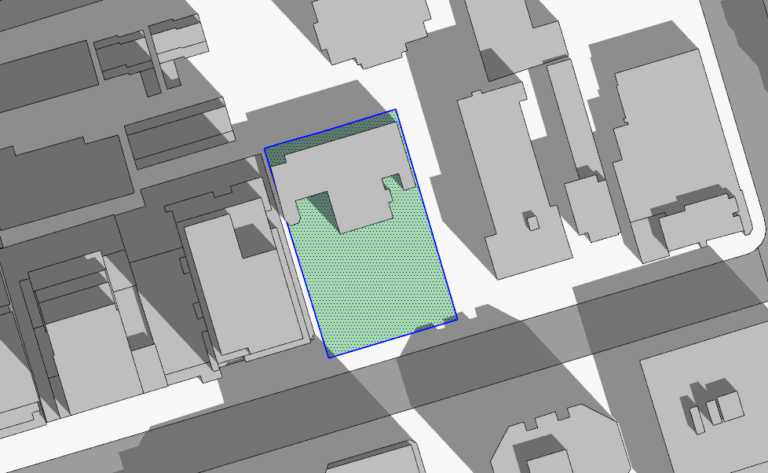
2. Select a colour for the element’s shadow that falls within the selected site.
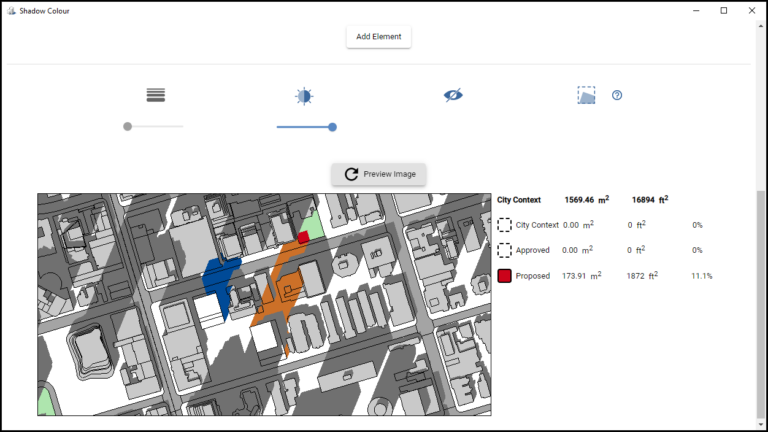
Area Calculation
Shadow Colour allows you to calculate the shadow area within selected sites.
To generate a shadow area calculation, please ensure the following:
- The view is Top and orthographic/parallel projection.
- The site is fully contained within the view.
Click on the Area Calculator icon.
Click on preview and the area calculation will be added next to the preview image.
Once you’re happy with the preview, you would want to export the shadow study.
Continue to the next article to see how.