Knowledge Base
-
Shadow Colour for SketchUp®
-
Shadow Colour for Autodesk® Revit®
-
Planary for Autodesk® Revit®
-
Planary for Autodesk® AutoCAD®
-
Plan Match for Autodesk® Revit®
-
- Articles coming soon
-
-
Account Management
Export Images and GIFs
There are multiple ways to export your shadow study.
Quick Export of a Single Image from Your Shadow Study:
- Open the Export Menu:
- Navigate to ‘File’ → ‘Export’ → ‘Single Image’. This action opens the export options for a single image.
- Select Export Quality:
- Choose the desired quality for your image. Higher quality settings will result in a larger file size.

Exporting Multiple Images at Once Using Time Intervals
Follow these steps to export multiple images from your shadow study:
- Access Export Options:
- Navigate to ‘File’ → ‘Export’ → ‘Time Interval’ to open the export settings for time intervals.
- Set Time Interval Details:
- Select the Date: Choose the specific date for your shadow study.
- Time Range: Define the start and end times for the images you want to export.
- Interval: Specify the time interval between each image in your export sequence.
- Image Quality:
- Choose the desired quality for the exported images. Higher quality settings may increase file size.
- Optional Features:
- Superposition Image: Add a superposition image to overlay all images into a single comprehensive shadow study image. This is useful for analyzing cumulative shadow effects over time.
- Anti-Alias: Enable this option to smooth out the edges in your images, improving visual quality.
- GIF Export: Create an animated GIF of your shadow study images. Adjust the delay between frames in milliseconds to control animation speed.
- Shadow Area Calculation: Export an Excel sheet with calculations of the shadow areas. This is helpful for detailed analysis and documentation of your study.
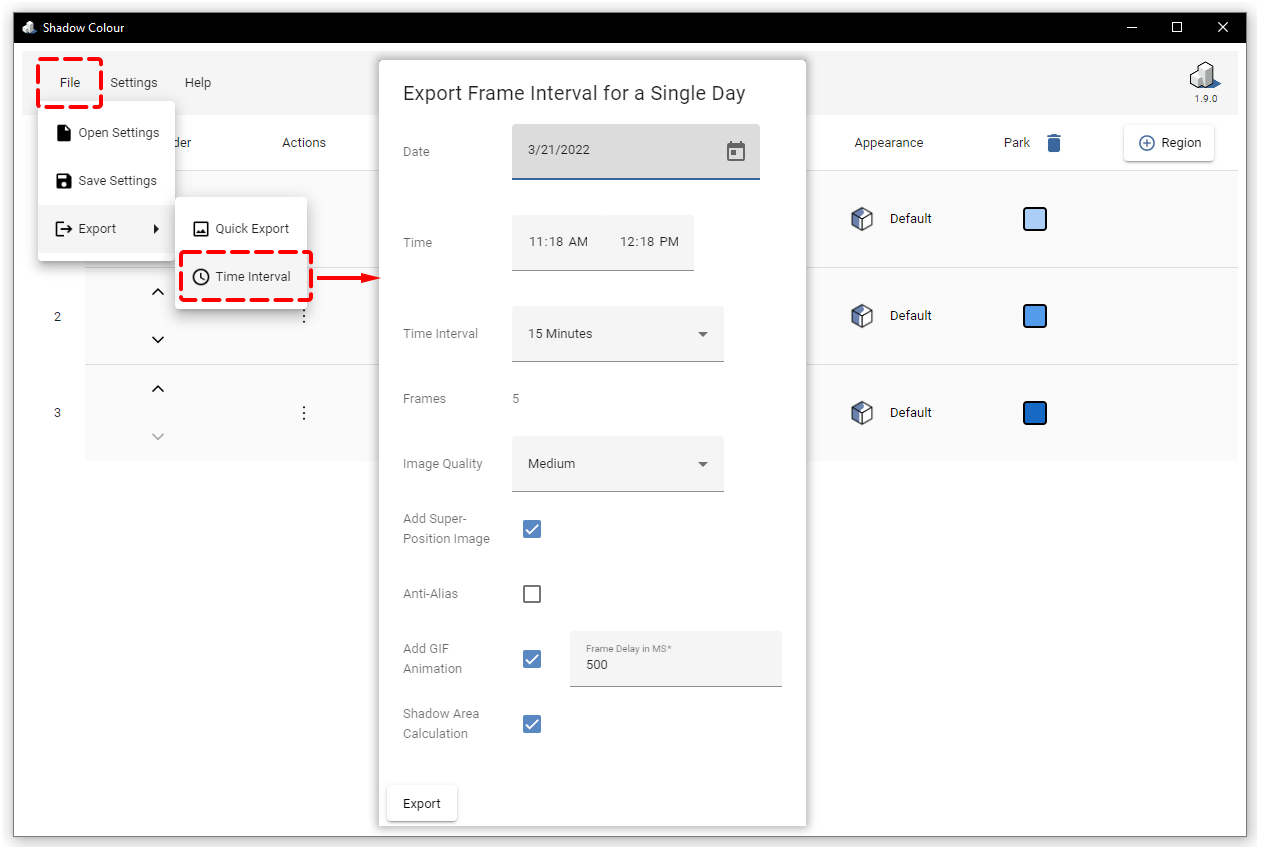
Table of Contents