-
Shadow Colour for SketchUp®
-
- Articles coming soon
-
-
Shadow Colour for Autodesk® Revit®
-
Planary for Autodesk® Revit®
-
Planary for Autodesk® AutoCAD®
-
Plan Match for Autodesk® Revit®
-
- Articles coming soon
-
-
Account Management
Conduct a Shadow Study
Add elements and assign colours
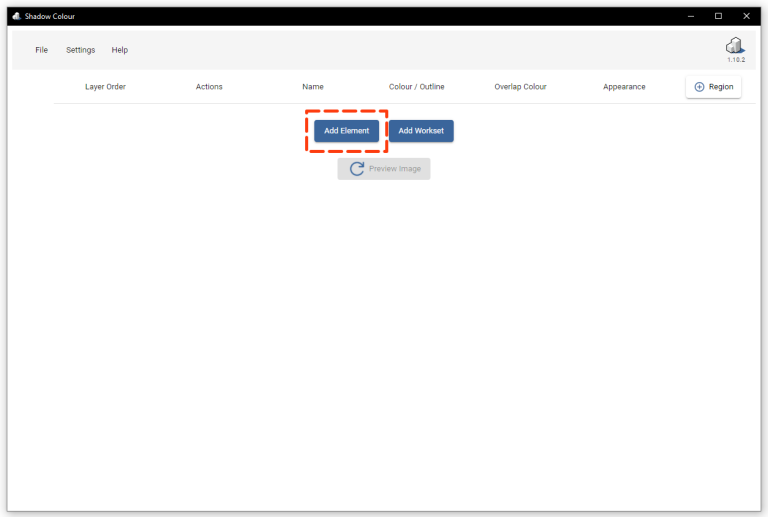
Option 1 – Add Elements From The View
Useful for early-stage study. It works best with fewer elements that can be easily picked from the view, such as Massing, Revit groups and linked files.
Click on ‘Add Element’ and pick a mass from the Revit view (any Revit component, mass, group or linked CAD). The first element will be the top layer (usually the city context), and the last element will be the bottom layer (usually the proposed building).
Group is recommended when you want to apply the same style to multiple elements.
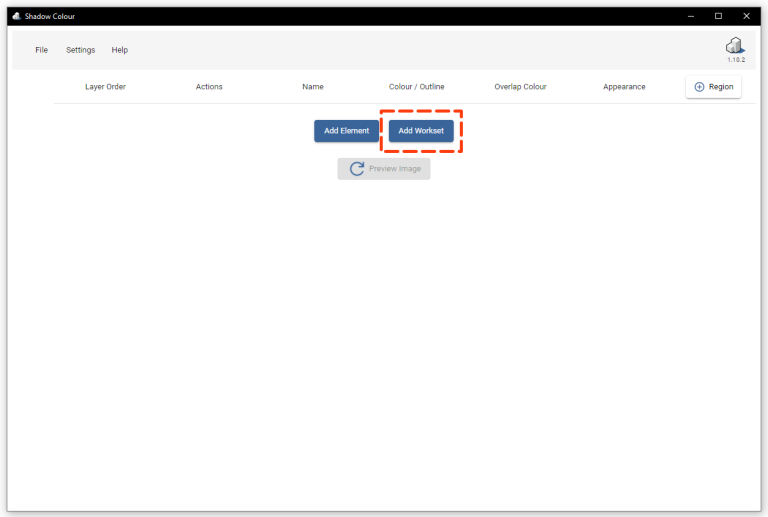
Option 2 – Select Worksets
Useful when your Revit project has many elements and is organized in different worksets.
Click ‘Add Workset’ and select a workset from the drop-down menu. The first selected workset will be the top layer (usually the city context), and the last element will be the bottom layer (usually the proposed building).
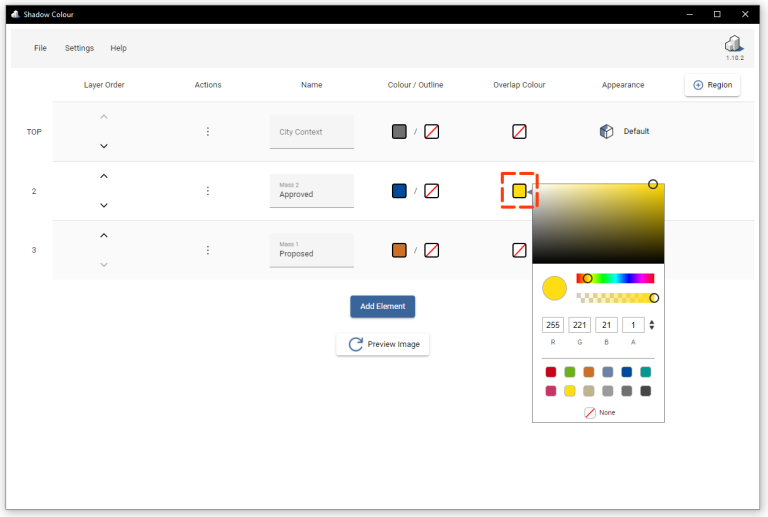
1. Assign colour and opacity for each element (layer) by using the colour picker. Select ‘As View’ to keep the shadow colour as in the Revit view, Or ‘None’ to hide the shadow.
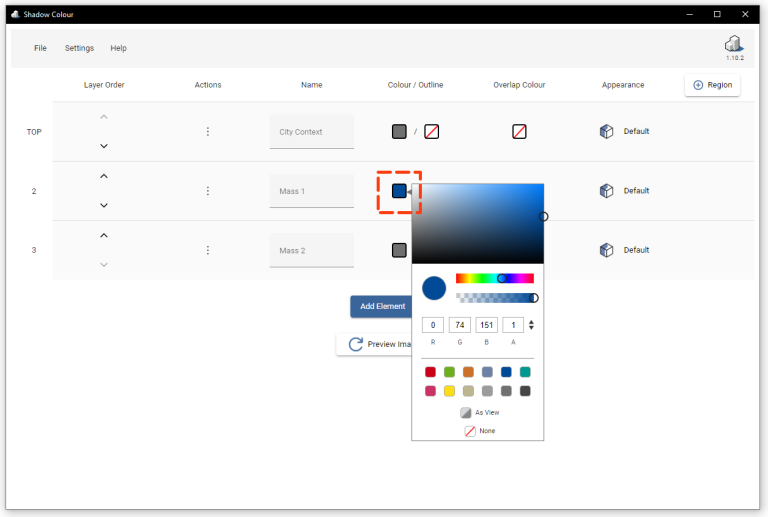
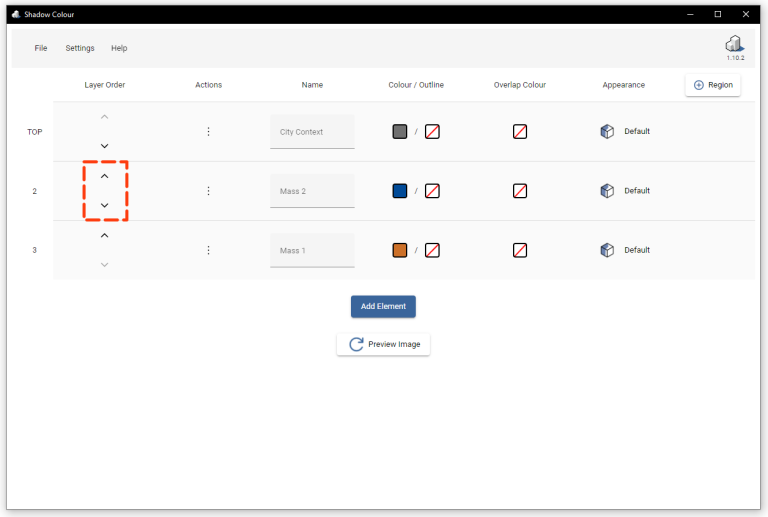
2. You may change the order of the shadows laid on top of each other.
Up – Bring element’s shadow forward
Down – Send element’s shadow backward
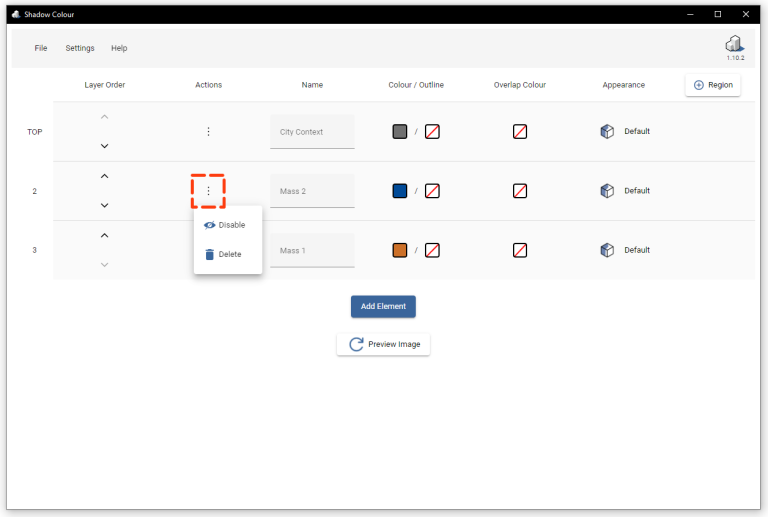
3. Under ‘Actions’, you can disable or delete the element from the study
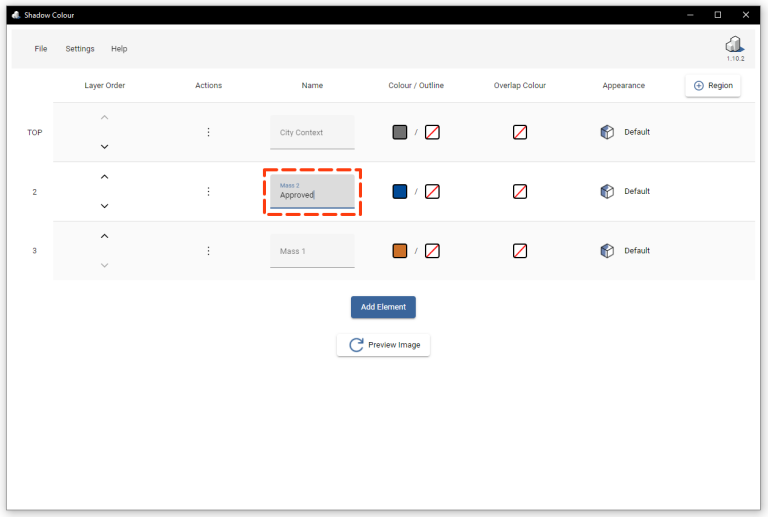
4. Under ‘Name’, you can rename the element.
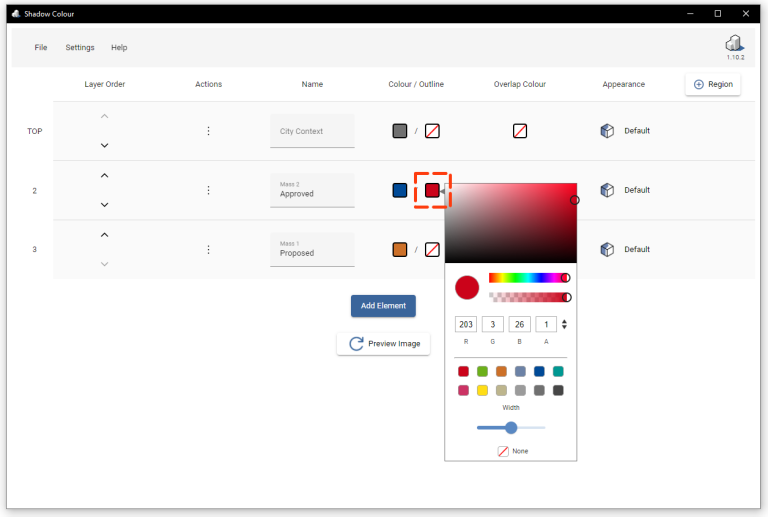
5. Create an outline for the shadow (optional). Choose a colour and outline width using the slider.
6. Under ‘Overlap Colour’, you can assign a colour for the overlapping shadow to the corresponding layer.
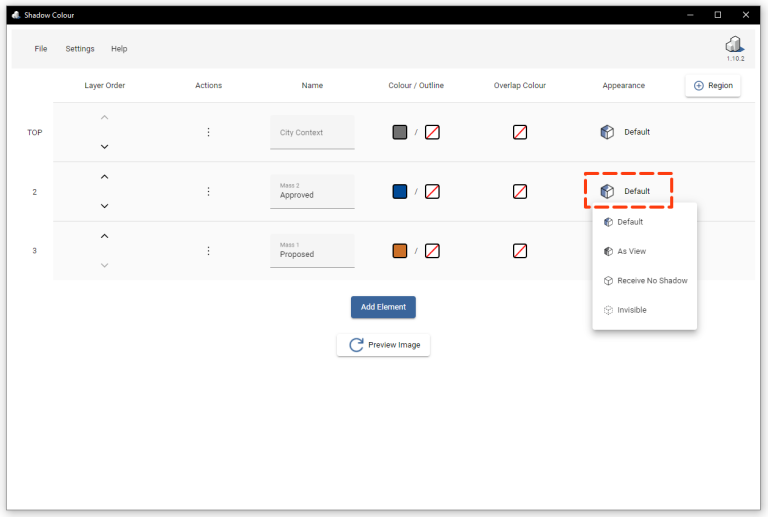
7. Under ‘Appearance’ , you can change the colour and the appearance of the shadows cast on top of the corresponding element (layer).
Default – Any shadow that is cast on this element will be coloured using the colour that was chosen for the element that is casting the shadow.
As View – Any shadow cast on this element will be coloured grey using the shadow intensity configured in Revit.
Receive No Shadow – Shadows cast on this element will not be shown.
Invisible – Element will be invisible, shadows of this element will be shown.
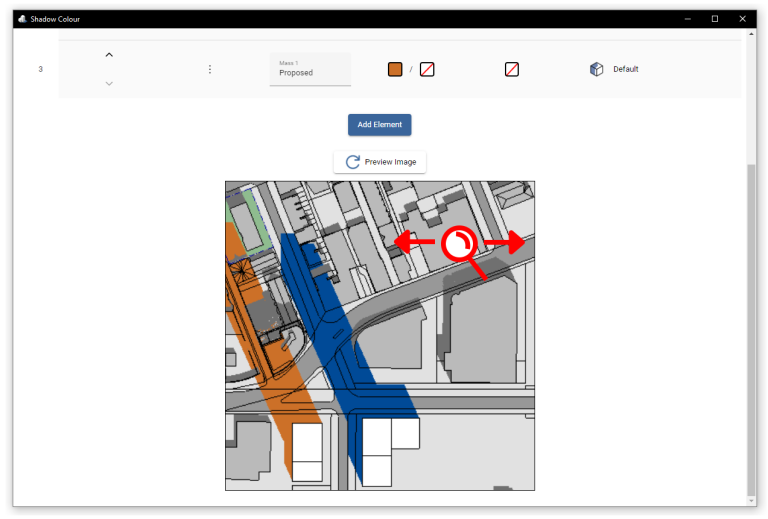
8. Click ‘Preview Image’ to get a preview of how your shadow study will look like.
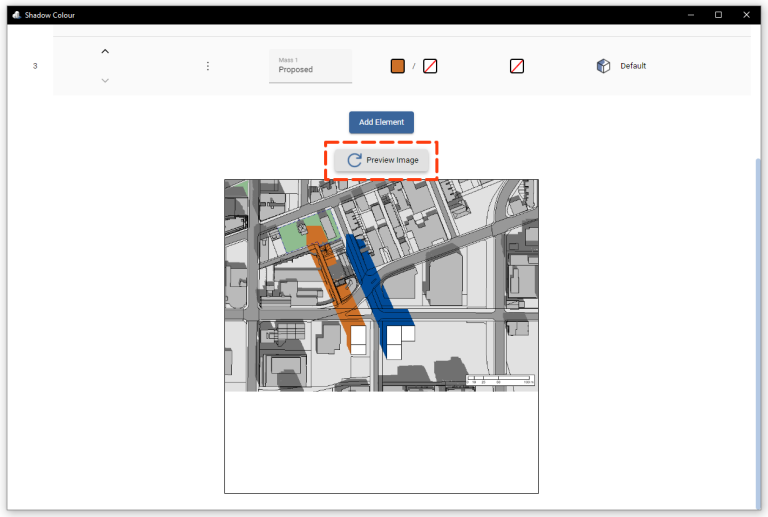
In the preview window, you can adjust the view of the image in two ways: To zoom in and out, use the scroll wheel on your mouse. To move the image around and see different parts of it (panning), press and hold the left mouse button while moving the mouse.