-
Shadow Colour for SketchUp®
-
Shadow Colour for Autodesk® Revit®
-
Planary for Autodesk® Revit®
-
Planary for Autodesk® AutoCAD®
-
Account Management
-
Changelog
-
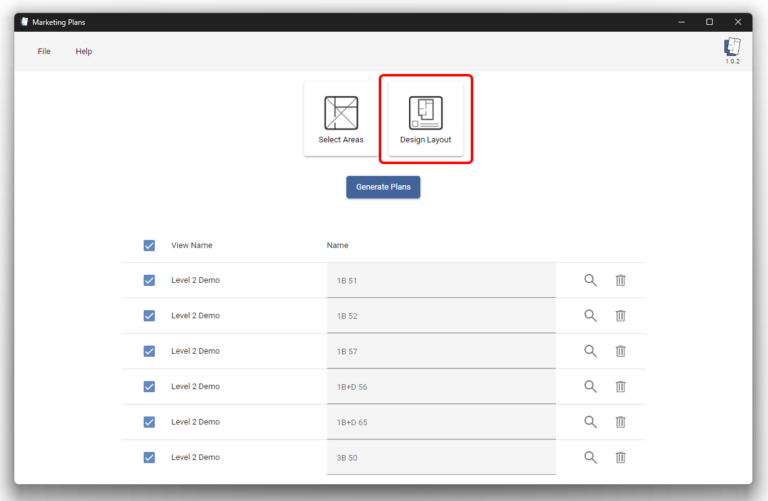
Marketing Plans for Autodesk® Revit®
Design Layout
The Design Layout section allows you to set up and customize the sheets that will be generated for your marketing plans.
To set up the layout, click Design Layout from the main Marketing Plans window.
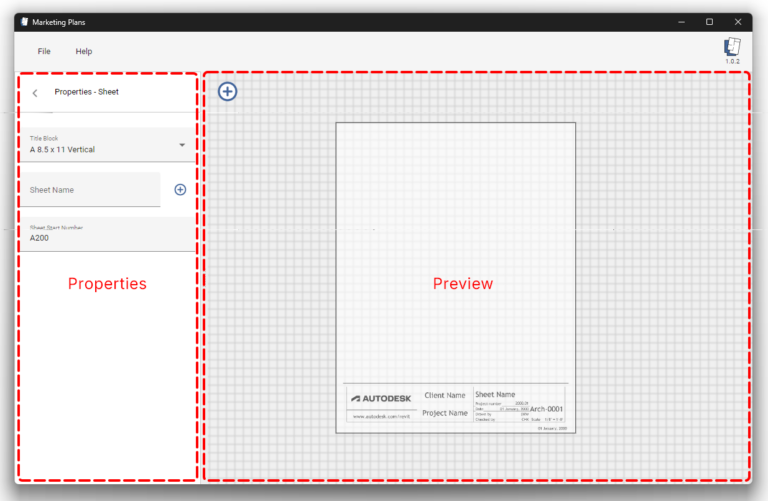
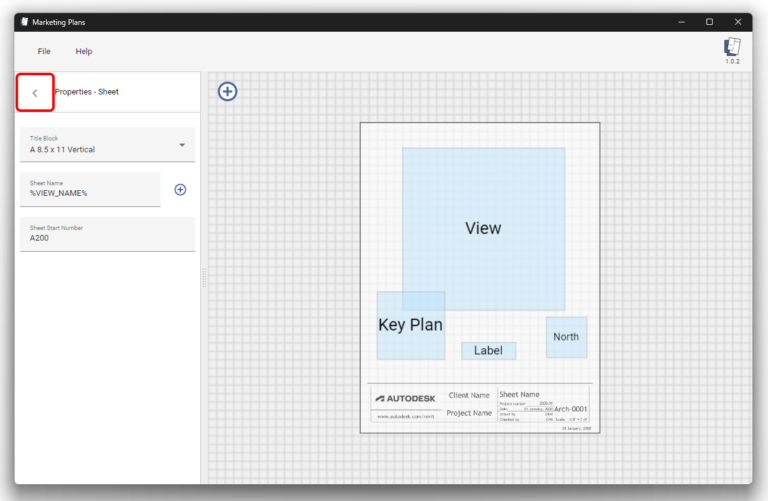
Design Layout Window Overview
The Design Layout window is divided into two main areas:
Preview: Displays a live preview of the sheet. You can zoom, pan, and visually position elements on the sheet.
Properties: Located on the left side. This panel is used to configure sheet settings and control the properties of each layout component.
Sheet Properties
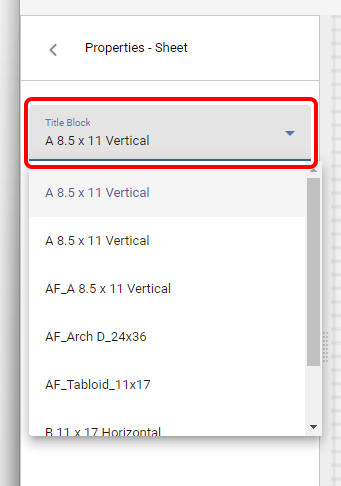
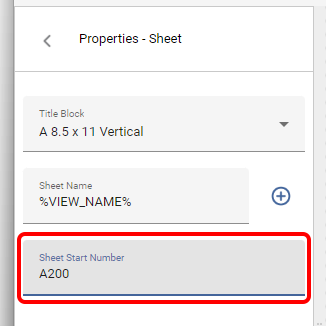
Title Block: Select the title block type from the dropdown list. Marketing Plans lists all title block types available in the current Revit project.
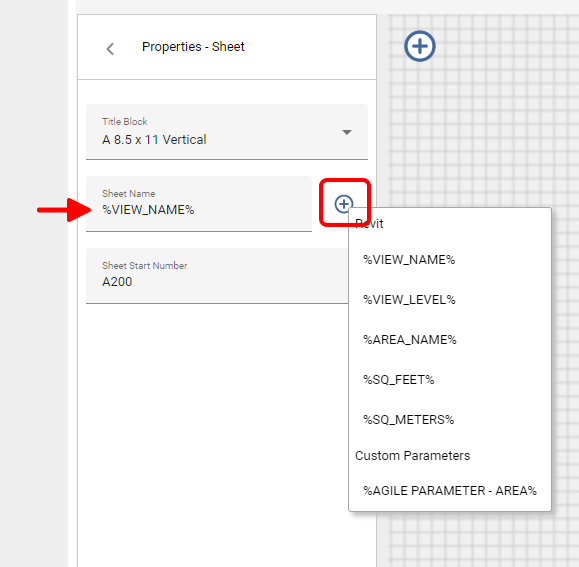
Sheet Name: Define the sheet name in the text field.
- Click the + icon to insert parameters such as unit name, level, area name, and other project parameters, including Revit Custom Area Parameters.
- Multiple parameters can be combined with custom text.
Note: If a sheet name already exists in Revit, a suffix will be added automatically.
Sheet Start Number: Set the starting sheet number. Marketing Plans will number subsequent sheets sequentially.
Note: If a sheet number already exists in Revit, a suffix will be added automatically..
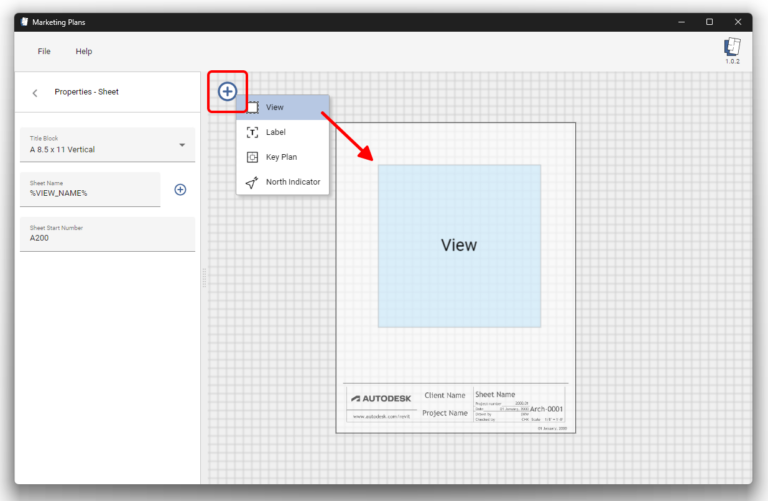
Adding Layout Components
To add components to the sheet, click the + icon in the preview. Available components include:
- Unit view
- Key plan
- Labels
- North indicator
After adding a component, drag it to position it on the sheet.
Note: The component bounding box is for placement reference and does not represent the final size.
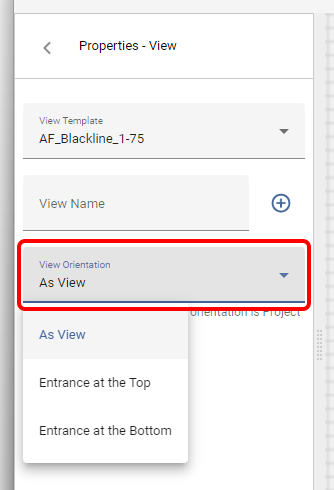
View Properties (Unit Layout View)
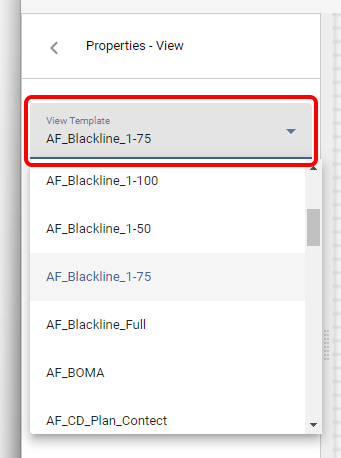
View Template: Select a View Template from the dropdown list.
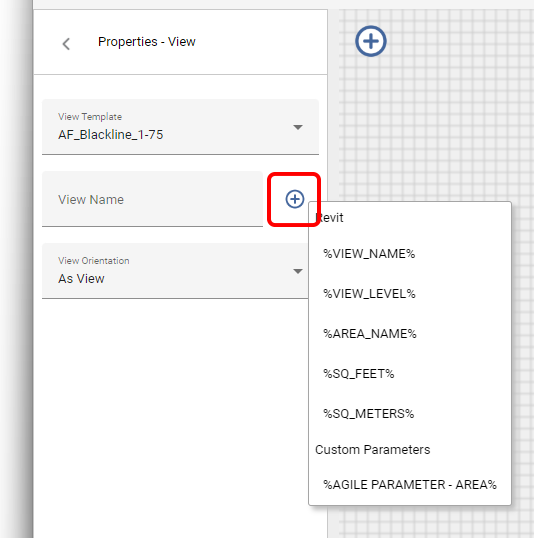
View Name: Define the view name manually or click the + icon to insert parameters such as unit name, level, or area name.
Multiple parameters can be combined with custom text.
View Orientation: Select the orientation of the unit view based on the entrance door location: Top, Bottom or As Is.
Note: Orientation is applied when the View orientation is set to Project North.
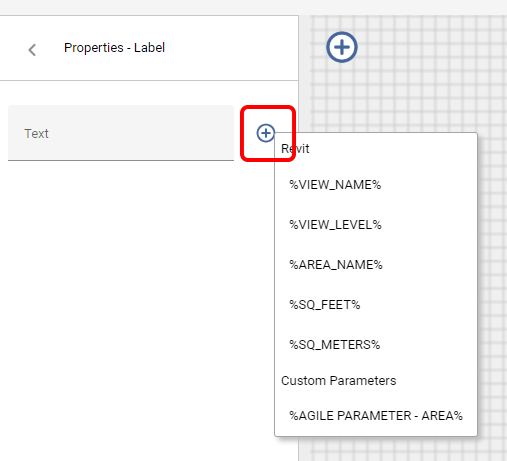
Label Properties
In the text field, enter custom text or click the + icon to insert parameters.
Supported parameters include: Area name, Level and custom area parameters. Multiple parameters can be combined with text.
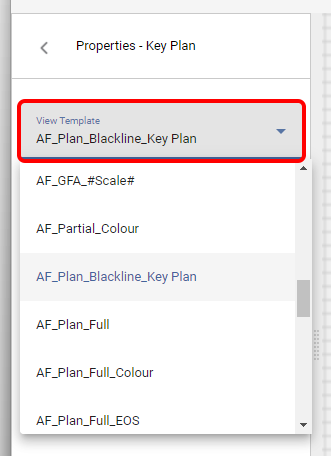
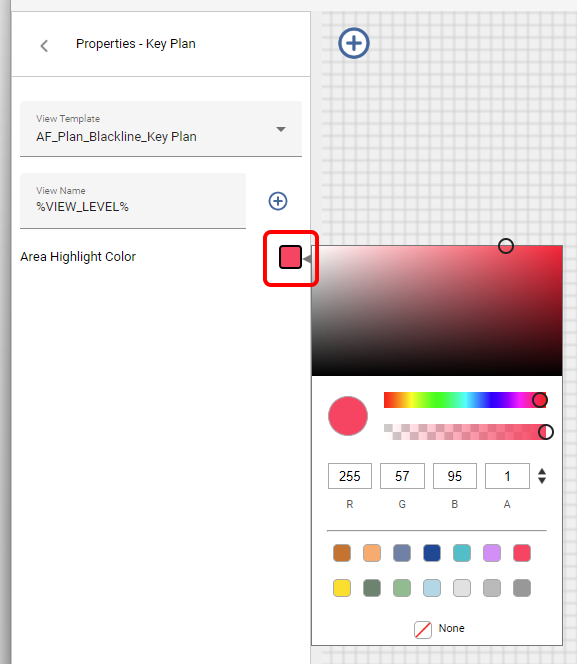
Key Plan Properties
View Template: Select a View Template for the key plan view.
View Name: Define the view name manually or insert parameters using the + icon.
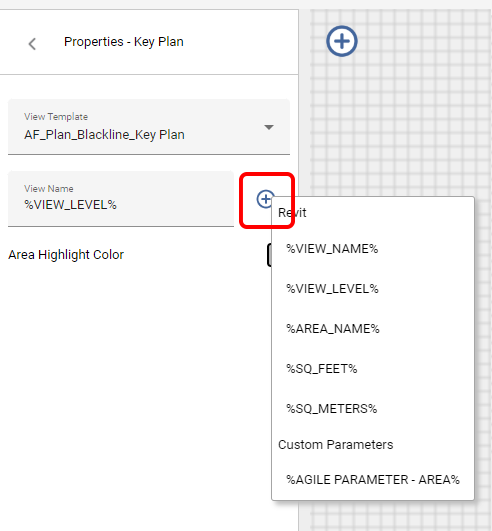
Area Highlight Color: To highlight the unit in the key plan, Marketing Plans creates a filled region over the unit area.
Select a color for the filled region to control the highlight appearance.
Recommendation: Saving Layout Settings
After setting up and organizing the layout, it is recommended to save the settings. This allows the same layout configuration to be reused.
To continue, click the arrow to return to the main window.
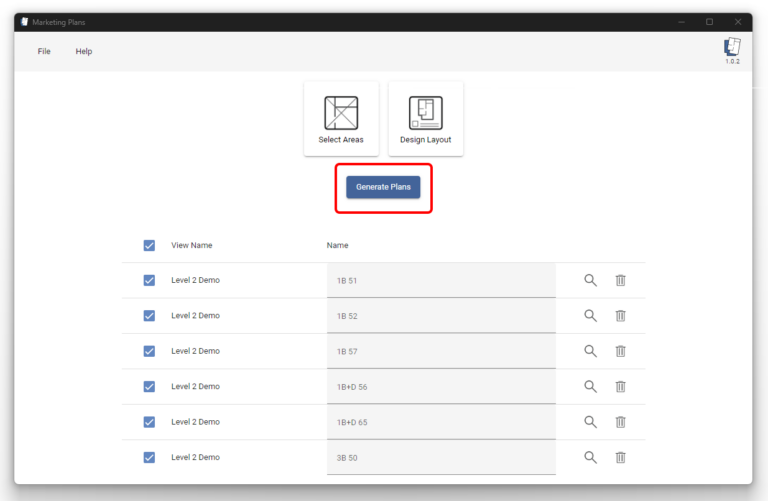
Generating Marketing Plans
To generate the Marketing Plans, click Generate Plans.
The full set of selected units will be generated and added to the Revit project.
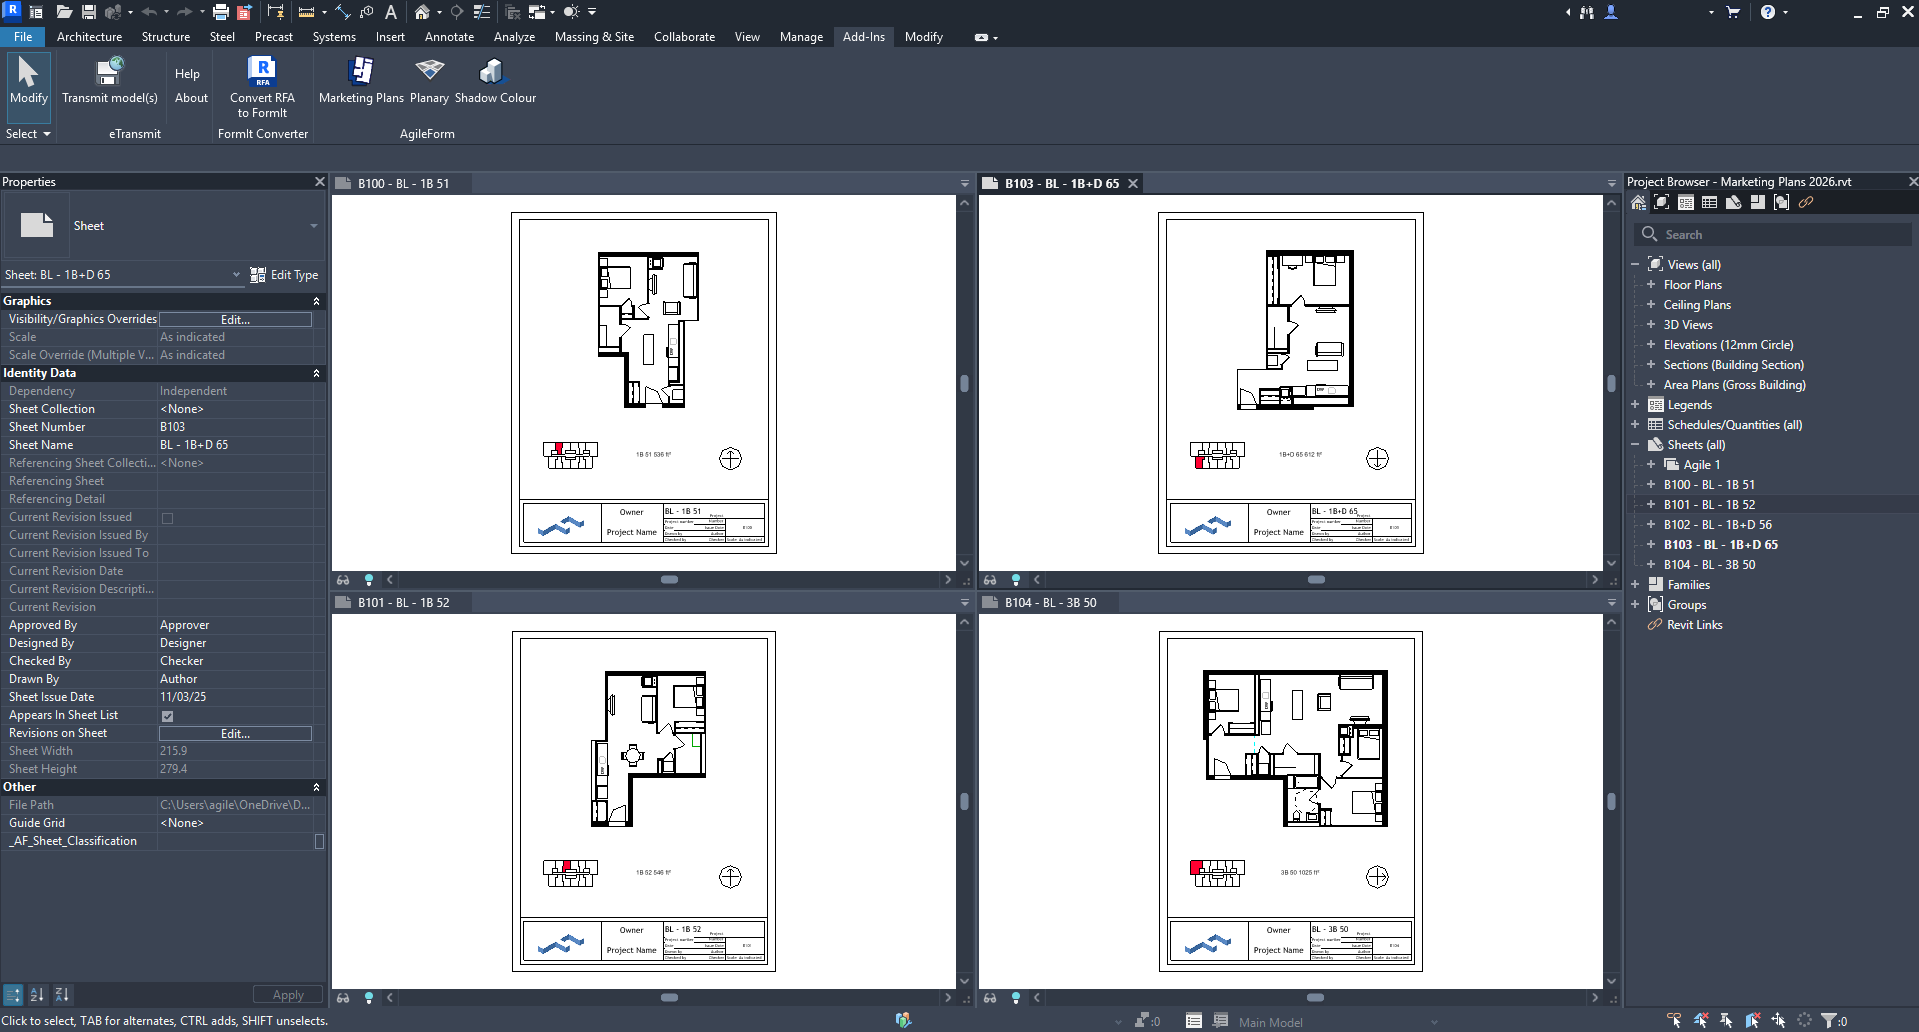
Resulting Sheets in Revit
After generating the Marketing Plans, a complete set of sheets is added to the Revit project.
Each sheet is created based on the selected units and the configured layout settings, including the title block, layout views, key plans, and labels.
Use the Project Browser in Revit to review the generated sheets.
Notes and Behavior
- The application does not overwrite or delete existing sheets or views.
- If a generated sheet or view name already exists, a suffix is added automatically.
- Generation time depends on project size and model complexity.
- The application does not modify or create new Revit element types.