-
Shadow Colour for SketchUp®
-
Shadow Colour for Autodesk® Revit®
-
Planary for Autodesk® Revit®
-
Planary for Autodesk® AutoCAD®
-
Plan Match for Autodesk® Revit®
-
- Articles coming soon
-
-
Account Management
-
Changelog
Save and Open Project
Save Project
To ensure your work is preserved, you can save your Planary project at any time. This will save all tabs, along with your preferences and settings.
- Save: To save your current progress, go to ‘File’ → ‘Save’ This will overwrite the previous version of your project with any new changes you’ve made.
- Save As: If you wish to save your project under a new name or location, go to ‘File’ → ‘Save As’ and select a location from the Windows browser.

Pro tip: Keep an eye out for the asterisk (*) symbol next to your project name. This symbol indicates that there have been changes to the project since your last save. It’s a visual reminder to save your work regularly and avoid losing any progress.

Open Project
Planary allows you to run multiple projects within a single session (window).
To open a project, select ‘File’ → ‘Open’, then choose a Planary file (.plny) from the Windows browser.

When two or more projects are open in the same session, Planary allows you to drag and transfer an option or a presentation sheet from one project to another.
This feature provides flexibility for reorganizing options and managing content across projects.

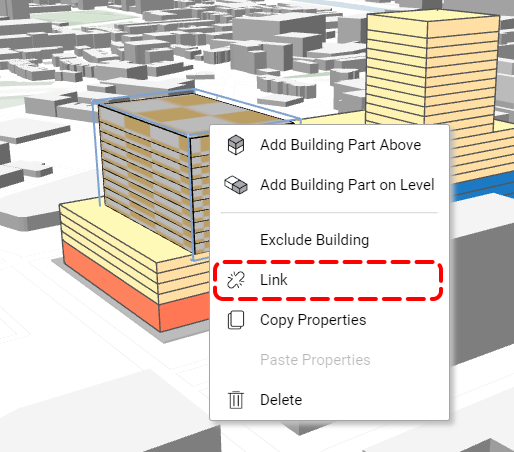
Planary will automatically link Polylines/Hatches used in the feasibility study to the project. If Planary cannot locate the corresponding Polylines/Hatches, you can manually relink them by right-clicking the element and selecting ‘Link’.
New Project
To create a new project, go to ‘File’ → ‘New’.

A new project tab will be added.
