-
Shadow Colour for SketchUp®
-
Shadow Colour for Autodesk® Revit®
-
Planary for Autodesk® Revit®
-
Planary for Autodesk® AutoCAD®
-
Plan Match for Autodesk® Revit®
-
- Articles coming soon
-
-
Account Management
-
Changelog
Get Started
What is Shadow Study?
Shadow Study is a set of illustrations that demonstrate the shadow impact from the proposed development.
The illustrations usually differentiate the proposed/approved building’s cast shadow from the existing context’s shadows.
The Shadow Colour tool allows you to do just that by assigning colours to each building’s shadow.
Set SketchUp for Shadow Study
1. Make sure all elements for the study are in groups or components, including the city context.
Only groups and components are selectable for Shadow Colour.
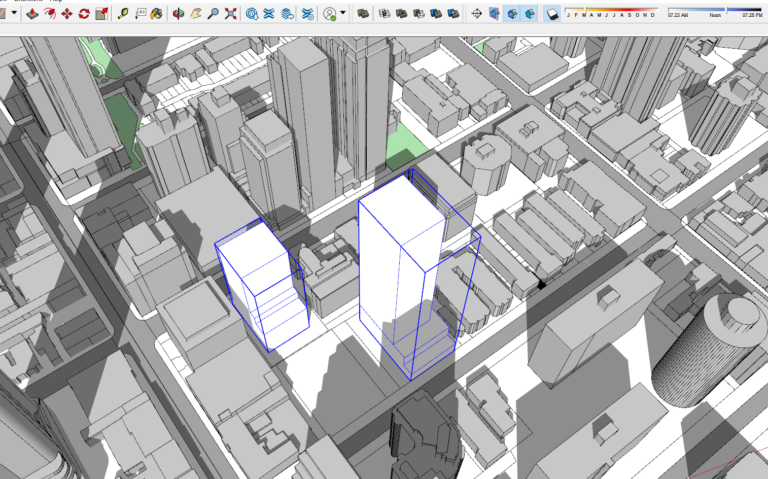
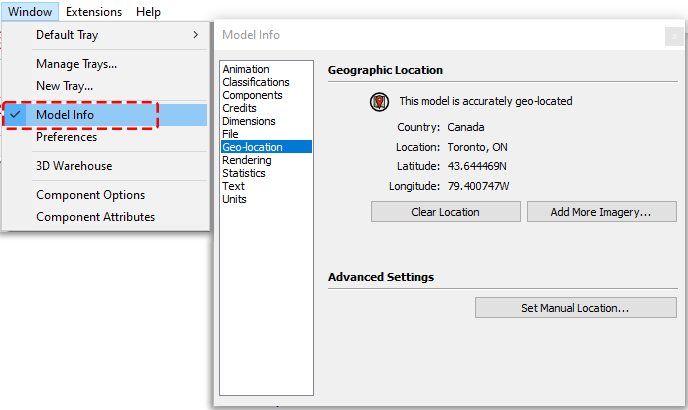
2. Set the geo-location of the project
Windows → Model Info → Geo-Location
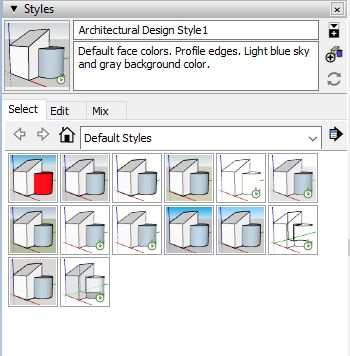
3. Set up the graphics for the view using the ‘Style’ tray.
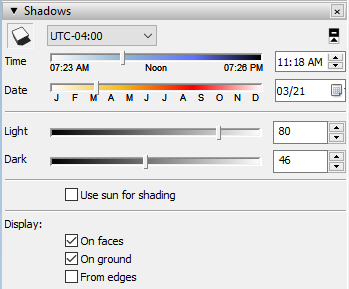
4. Set up the time and date, including the UTC from the ‘Shadows’ tray
5. Set up the desired camera position (Shadow Colour supports any camera position).
To create a shadow study from a top view:
- Camera → Standard Views → Top
- Camera → Parallel Projection
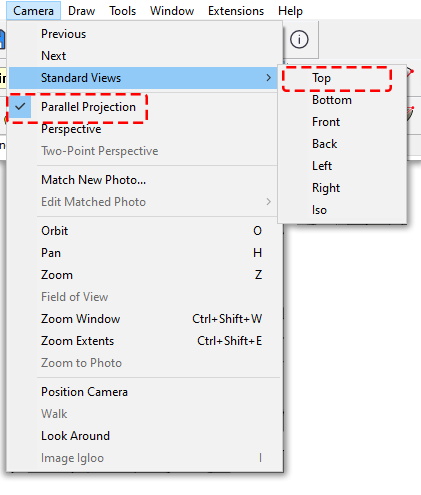
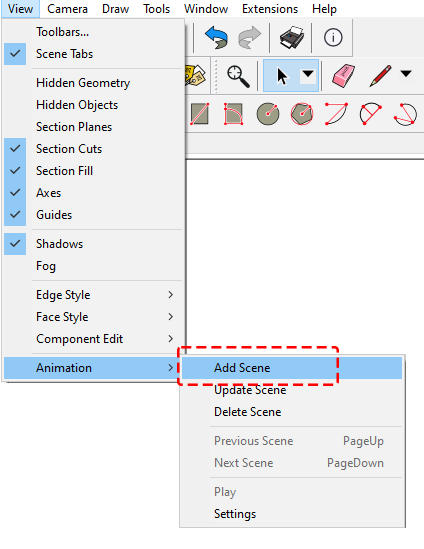
We recommend saving the view as a new scene:
- View → Animation → Add Scene
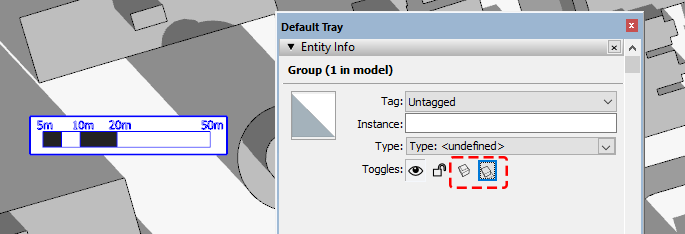
Optional: Add a scale bar to the model
You may want to add a scalebar to your study.
Once you add your scale bar, make sure to disable casting and receiving shadows:
‘Entity Info’ → ‘Toggles’ → disable ‘Receive Shadows’ and ‘Cast Shadows’.
You’re now ready to start your shadow study! Continue to the next article to learn how to conduct your study.
